Multi-column Split View
The core of a multi-column app is UISplitViewController.
Two-Column layout
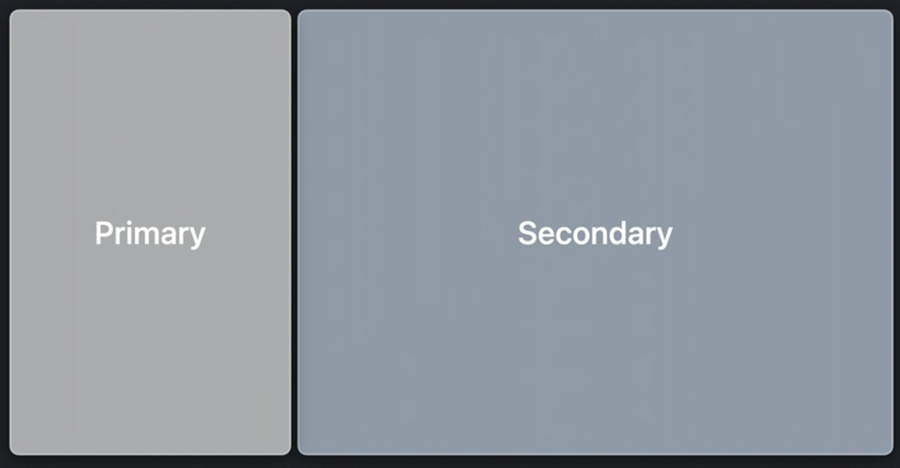
Define your split view controller:
let splitViewController = UISplitViewController(style: .doubleColumn)Set the view for each column:
splitViewController.setViewController(sidebarViewController, for: .primary)
splitViewController.setViewController(myHomeViewController, for: .secondary)
Three-column layout
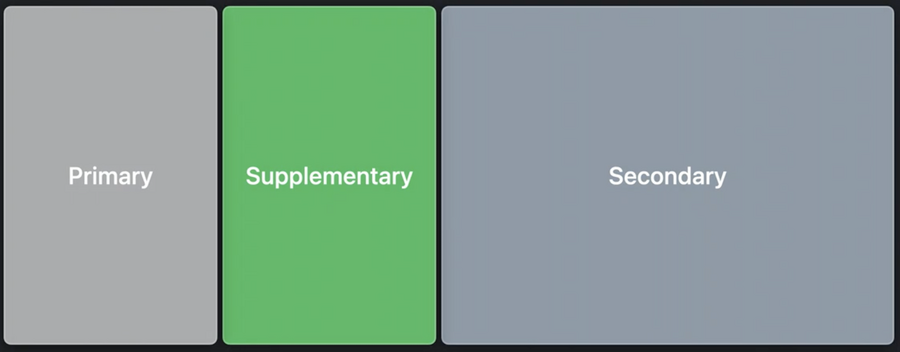
Define your split view controller:
let splitViewController = UISplitViewController(style: .tripleColumn)Behind the scenes
Apple wants you to use this so your app adapts to both iPad and iPhone:
UISplitViewControllerhandles the columns for you by showing the right view controllers based on size classes.we can specify a different view to be used when in compact mode via the
UISplitViewController’ssetViewController(_:for:)method and passing.compactas the column layout. This view can have a completely different navigation (for example a tab bar).
Display Modes
The different ways
UISplitViewControllercan lay out your columns are calledDisplayModes: they differ depending on how much space we have and how big they are.To move between these display modes,
UISplitViewControllerautomatically creates appropriate buttons and makes them appear in the right places.Some display modes can be shown via gestures, if needed, disable them via the
presentsWithGestureproperty.Use
showsSecondaryOnlyButtonto enable an additional button which hides all but the secondary column.
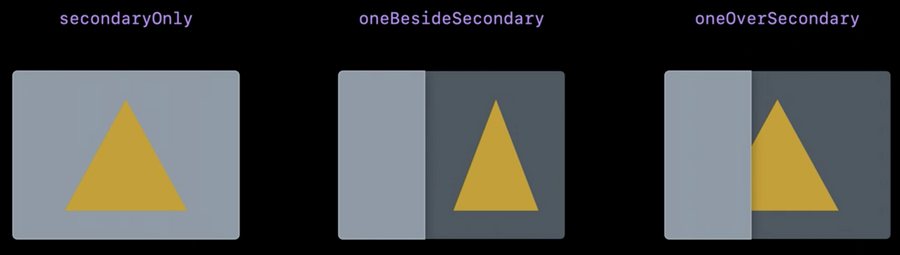
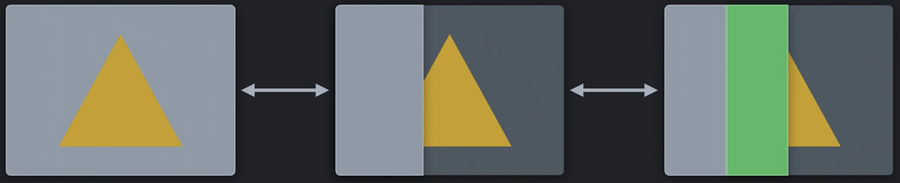
Double Column Display Modes
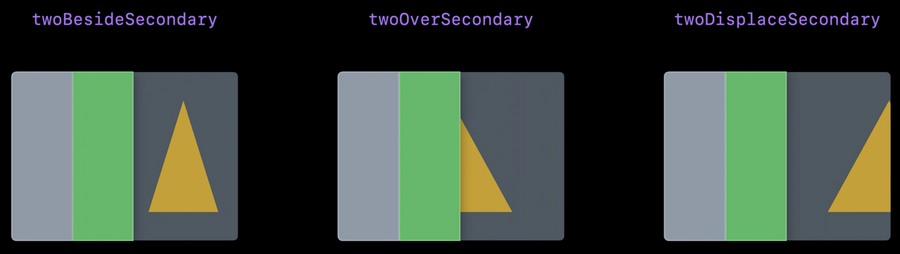
Triple Column Display Modes
Setting the preferred split behavior
Set your app preferred split behavior via preferredSplitBehavior:
.tile:
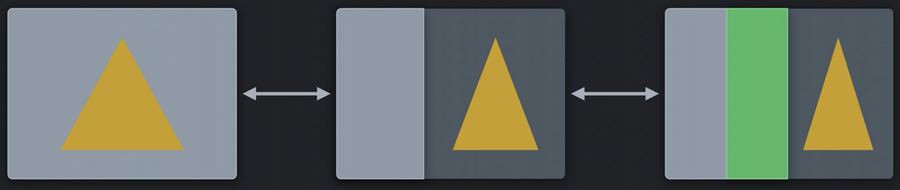
.displace:
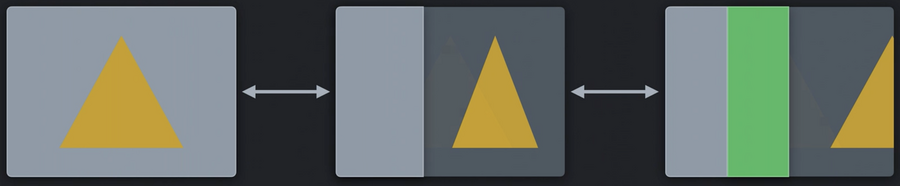
.overlay:
Hide Columns
At any time we can hide any of the columns:
splitViewController.hideColumn(.primary)

splitViewController.showColumn(.supplementary)
Navigation Controllers
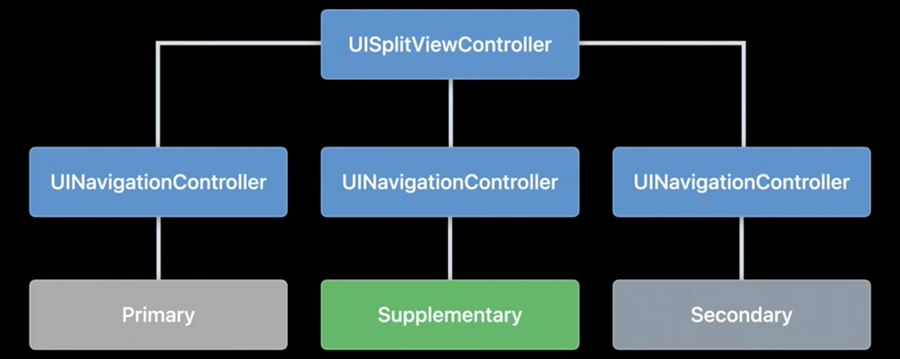
Each UISplitViewController column has a navigation controller that’s automatically created, and each navigation controller has a navigation bar at the top and an optional toolbar at the bottom.
Lists
Setup your primary/secondary views by building a list via UICollectionView:
let configuration = UICollectionLayoutListConfiguration(appearance: .sidebar)
let layout = UICollectionViewCompositionalLayout.list(using: configuration)
let collectionView = UICollectionView(frame: frame, collectionViewLayout: layout)
Then register your cells with the new CellRegistration API:
let cellRegistration = UICollectionView.CellRegistration<UICollectionViewListCell, MyItem> { cell, indexPath, item in

    var content = cell.defaultContentConfiguration()

    content.text = item.title
    content.image = item.image

    cell.contentConfiguration = content
}
And create a diffable data source:
let dataSource = UICollectionViewDiffableDataSource<Section, MyItem>(
        collectionView: collectionView
    ) { collectionView, indexPath, item in
   collectionView.dequeueConfiguredReusableCell(using: cellRegistration,
                                                for: indexPath,
                                                item: item)
}
In the supplementary column do the same but with the plain style:
let configuration = UICollectionLayoutListConfiguration(appearance: .sidebarPlain)
let layout = UICollectionViewCompositionalLayout.list(using: configuration)
let collectionView = UICollectionView(frame: frame, collectionViewLayout: layout)