Hitches
Scrolling animation sometimes appears to jitter, those jitters in Xcode are called hitches
A hitch is a frame that is displayed on the screen later than expected.

iPhones and iPads have screens with 60Hz refresh rate, iPad Pros go up to 120Hz. 60Hz means that each frame should stay on screen for 16.67ms, 120Hz means 8.33ms
VSYNC is what usually manages swapping frames on screen, we see a hitch when a frame misses its expected VSYNC
Hitch Metrics
Hitch time: how many ms a frame is late
Hitch ratio: Hitch time in ms per second for a given duration of hitches for a given duration (for a test, scroll event or transition)
Hitch time isn’t accurate as the desired screen refresh rate isn’t always 60 or 120fps, it can be perfectly fine for VSYNC to swipe zero frames for an idle screen
This is why we use Hitch ratio, it’s consistent across different cases and tests
User impact targets for hitch ratio:
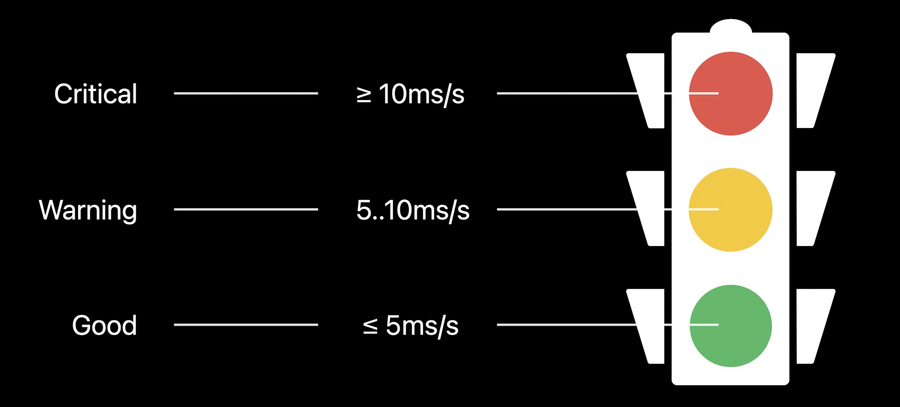
You should always aim to have <= 5ms/s hitch ratio
Measuring Hitches
It’s possible to measure hitches in development and production environment (production for iOS 14 only) using different tools:
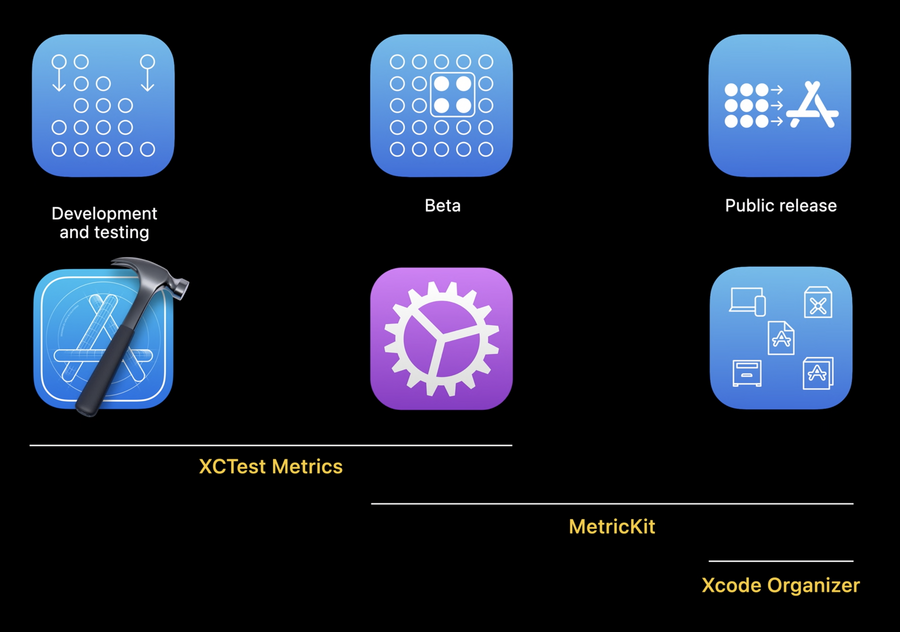
XCTest Metrics is used to measure hitches in development environment, while MetricKit and Xcode Organizer can show you measures from the customers devices directly
XCTest Metrics has many tests you can use to measure different parts of your application, the one we’re concerned with here is
XCTOSSignPostMetricXCTOSSignPostMetricused to measure animation duration in previous versions of Xcode, new in Xcode 12, this metric will provide 5 additional information:Total count of hitches
Total duration of hitches
Hitch time ratio
Frame rate
Frame count
To collect these metrics, you should write a test case that collects
os_signpostintervals with the newIn Xcode 11, this produced a non-animation
os_signpostintervals:
os_signpost(.begin, log: logHandle, name: "performInterval")
os_signpost(.end, log: logHandle, name: "performInterval")
Now in Xcode 12, you can use the
.animationBegininstead to specify the extra metrics related to animation:
os_signpost(.animationBegin, log: logHandle, name: "performAnimationInterval")
os_signpost(.end, log: logHandle, name: "performAnimationInterval")
You can also use one of the predefined
UIKitinstrumented intervals for testing around navigation transitions and scrolling, these are sub-metrics provided on the XCTOSSignpostMetric class.
extension XCTOSSignpostMetric {
	 open class var navigationTransitionMetric: XCTMetric { get }
	 open class var customNavigationTransitionMetric: XCTMetric { get }
	 open class var scrollDecelerationMetric: XCTMetric { get }
	 open class var scrollDraggingMetric: XCTMetric { get }
}
Here is a sample test case that launches the app, taps on ”Meal Planner” and measures the scrolling animation in a
.fastvelocity:
// Measure scrolling animation performance using a Performance XCTest
func testScrollingAnimationPerformance() throws {
	app.launch()
	app.staticTexts["Meal Planner"].tap()
	let foodCollection = app.collectionViews.firstMatch

	measure(metrics: [XCTOSSignpostMetric.scrollDecelerationMetric]) {
	foodCollection.swipeUp(velocity: .fast)
	}
}
To avoid swiping between different content in the 5 iterations of the measure block, we can reset the application state during measurements:
func testScrollingAnimationPerformance() throws {
	app.launch()
	app.staticTexts["Meal Planner"].tap()
	let foodCollection = app.collectionViews.firstMatch

	let measureOptions = XCTMeasureOptions()
	measureOptions.invocationOptions = [.manuallyStop]

	measure(metrics: [XCTOSSignpostMetric.scrollDecelerationMetric],
		options: measureOptions) {
	foodCollection.swipeUp(velocity: .fast)
	stopMeasuring()
	foodCollection.swipeDown(velocity: .fast)
	}
}
Tips for creating performance tests:
Create a separate test scheme for your Performance XCTest
Use
ReleaseBuild Configuration and uncheck Debug executableSwitch off Automatic Screenshots and Code Coverage
Turn off all diagnostic options, checkers, sanitizers and memory management
