Key Takeaways
🖥️ Feature parity on visionOS, iOS, iPadOS & macOS
💡 Lights on visionOS
🔘 New hover effect styles: highlight & shader
👋 Hand tracking via AnchorEntities for hand joints
🧲 Force effects
⛓️💥 Physics joints
🧿 Portal enhancements
👁️ BillboardComponent
🪩 Subdivision surface & much more
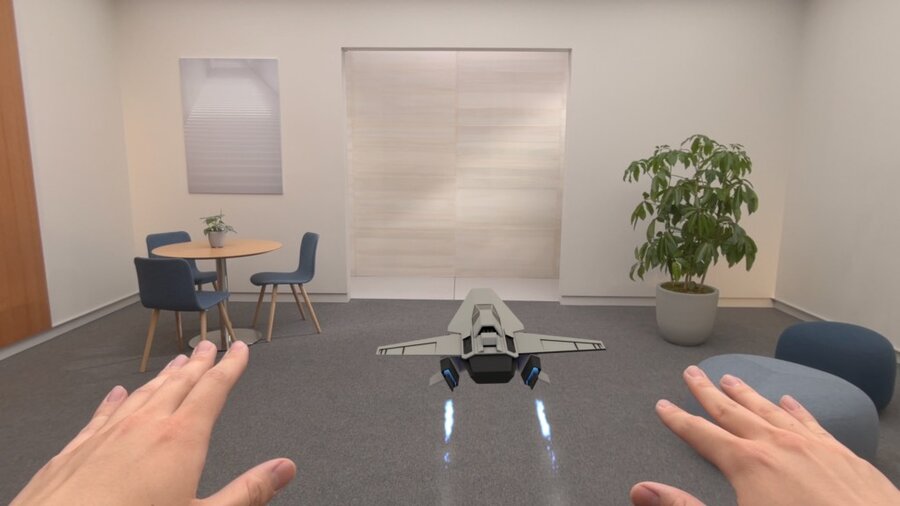
Sample game
The presenter, Yidi Zhu, a RealityKit engineer, showcases the new features of RealityKit by creating a toy spaceship game in this session. The game is extended in the session Enhance your spatial computing app with RealityKit audio and the sample code is available online.
New features not covered in detail
The following new capabilities of RealityKit are just briefly mentioned in this session, the viewer is referred to the documentation:
Low-level access to meshes and textures via
LowLevelMeshandLowLevelTexture.New animation system capabilities, such as animation timelines in Reality Composer Pro.
BillboardComponentintroduces a privacy-preserving way to make entities always face the user.PixelCast enables pixel-perfect entity selection through a rendering-based approach.
Subdivision surface enables smooth surfaces rendering without creating a dense mesh.
Cross-platform capabilities
RealityKit has achieved feature parity on all platforms (except tvOS): visionOS, iOS, iPadOS and macOS. But there are differences to consider, when developing a cross-platform app:
| visionOS | iOS, iPadOS, macOS |
|---|---|
| Spatial UI layout | 2D UI layout |
| ImmersiveSpace | RealityView |
| Hands-based input | Touch-based input |
To this end, RealityView has received some enhancements like camera mode and post processing.
The camera mode can be set to world tracking like this:
RealityView { content in
#if os(iOS)
    content.camera = .worldTracking
#endif
}
Dynamic lights
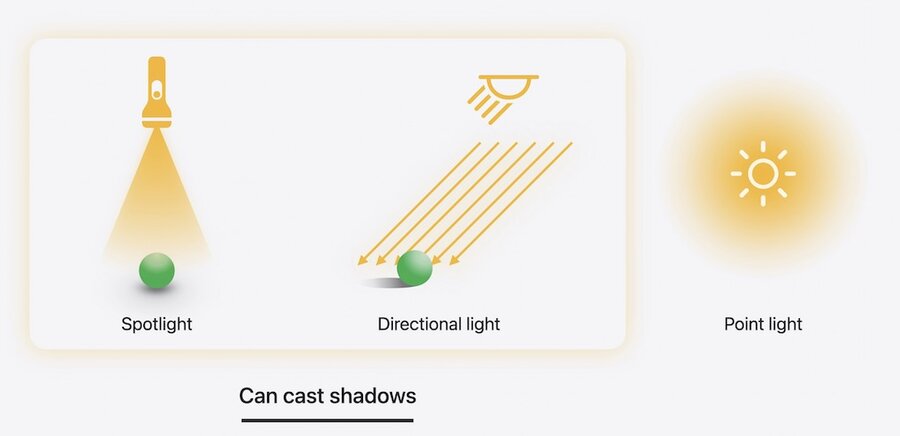
RealityKit’s three types of lights are now available in visionOS 2.0 (author’s comment: Finally! 🎉).
However, only spot and directional lights can cast shadows (author’s comment: 😭).
Here’s how to add a spotlight to a spaceship’s Headlight entity:
guard let lightEntity = spaceship.findEntity(named: "HeadLight") else { return }
lightEntity.components.set(SpotLightComponent(color: .yellow, intensity: 10000.0, attenuationRadius: 6.0))
lightEntity.components.set(SpotLightComponent.Shadow())If you don’t want an entity to cast a shadow, use this code:
let component = DynamicLightShadowComponent(castsShadow: false)
entity.components.set(component)
Hover effects
HoverEffectComponent has two new styles, in addition to the default spotlight style:
Highlight: The
highlightstyle applies a uniform highlight to the entire mesh. Its tint color and strength can be modified, which is now also possible for thespotlightstyle:
let highlightStyle = HoverEffectComponent.HighlightHoverEffectStyle(color: .lightYellow, strength: 0.8)
let hoverEffect = HoverEffectComponent(.highlight(highlightStyle))
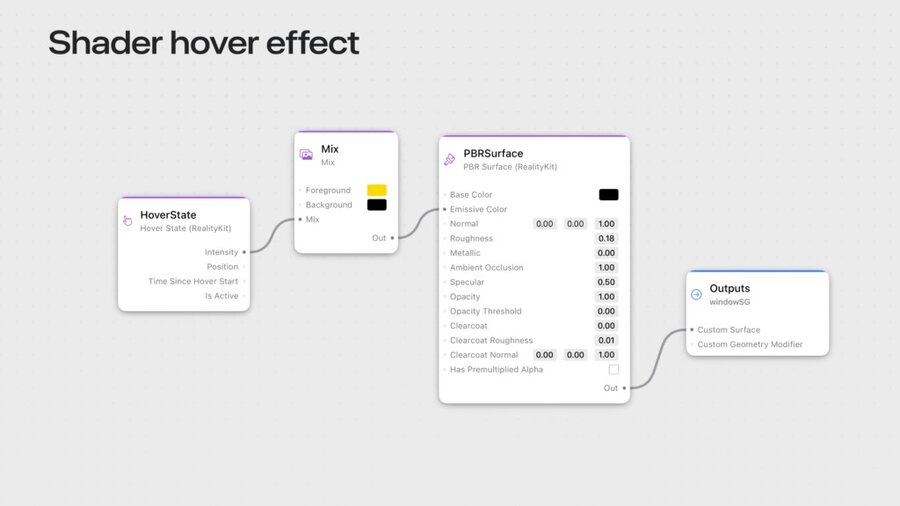
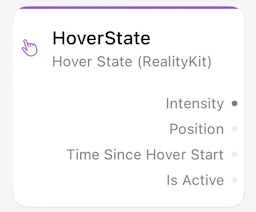
spaceship.components.set(hoverEffect)Shader: The shader style integrates with a shader graph material created with Reality Composer Pro, using the HoverState node’s intensity value:
let hoverEffect = HoverEffectComponent(.shader(.default))
spaceship.components.set(hoverEffect)
A more complex example is developed in the session Build a spatial drawing app with RealityKit
Hand tracking
Spatial Tracking API makes custom hand tracking easier, which was previously possibly through ARKit only:
Use a
SpatialTrackingSessionto get the user’s consent for hand tracking.Create an
AnchorEntityfor a joint like this:
Here’s how to control a spaceship’s acceleration via the distance between left thumb and index finger, in a system’s update function:
class HandTrackingSystem: System {
    func update(context: SceneUpdateContext) {
        let indexTipPosition = indexTipEntity.position(relativeTo: nil)
        let thumbTipPosition = thumbTipEntity.position(relativeTo: nil)
        let distance = distance(indexTipPosition, thumbTipPosition)
        let force = spaceship.transform.forward * computeThrottle(with: distance)
        spaceship.addForce(force, relativeTo: nil)
    }
}
Another example is developed in the session Build a spatial drawing app with RealityKit
Force effects
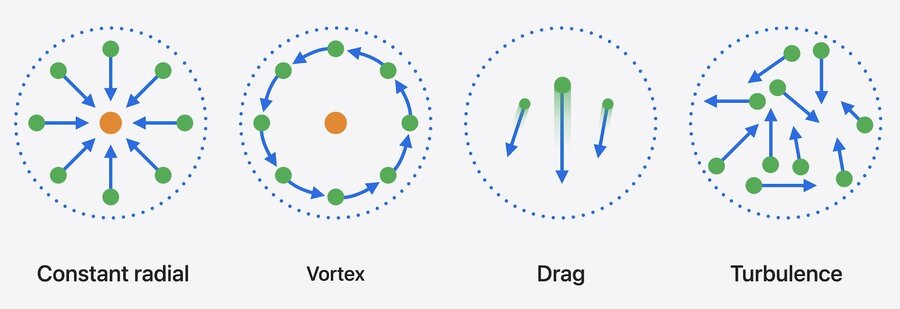
There are 4 built-in force effects, that define a volume and continuously apply forces to physics bodies in that volume:
Constant radial applies a constant force towards the center
Vortex applies forces that circulate bodies around the axis
Drag applies a breaking force proportional to the velocity
Turbulence applies random forces
Custom force effects can be defined by setting parameterTypes, forceMode, and an update function of a ForceEffectProtocol, like this gravity effect:
struct Gravity: ForceEffectProtocol {
    var parameterTypes: PhysicsBodyParameterTypes { [.position, .distance] }
    var forceMode: ForceMode = .force

    func update(parameters: inout ForceEffectParameters) {
        guard let distances = parameters.distances,
              let positions = parameters.positions else { return }

        for i in 0..<parameters.physicsBodyCount {
            let force = computeForce(distances[i], positions[i])
            parameters.setForce(force, index: i)
        }
    }
}
Custom force effects can be activated like this:
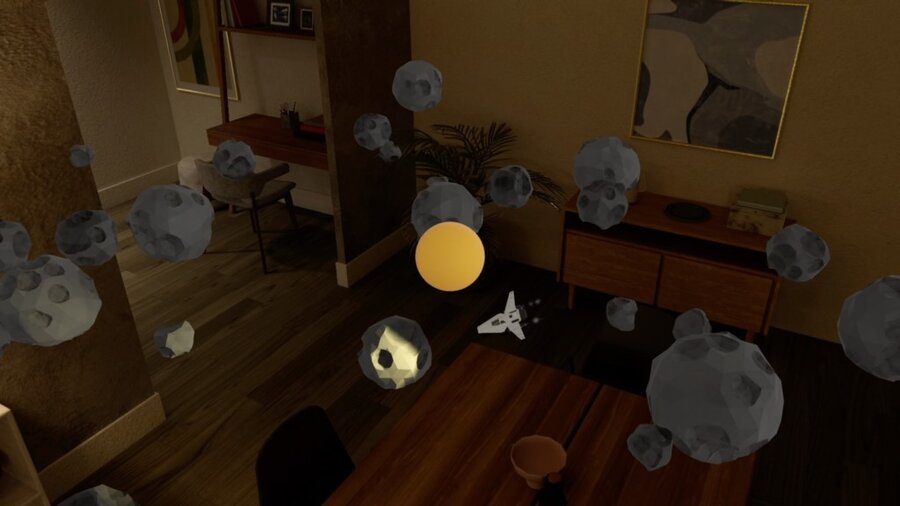
let gravity = ForceEffect(effect: Gravity(),
                          spatialFalloff: SpatialForceFalloff(bounds: .sphere(radius: 8.0)),
                          mask: .asteroids)
planet.components.set(ForceEffectComponent(effects: [gravity]))
To apply an initial velocity to an entity, use
PhysicsMotionComponentlike this:let physicsMotion = PhysicsMotionComponent(linearVelocity: initialVelocity) asteroid.components.set(physicsMotion)
Physics joints
Joints connect two pins of two physics bodies together through constraints regarding translation and/or rotation. Pins define a position and orientation that’s relative to the entity. There are 6 types of joints:
Fixed: Disallows translation and rotation.
Spherical: Prevents translation, allows limited Y/Z axis rotation and free rotation around the X-axis.
Revolute: Prevents translation, allows only rotation around the X-axis.
Prismatic (also called slide joint): Only allows translation along the X-axis.
Distance: Allows free movement as long as the distance between the two bodies is within a given range.
Custom

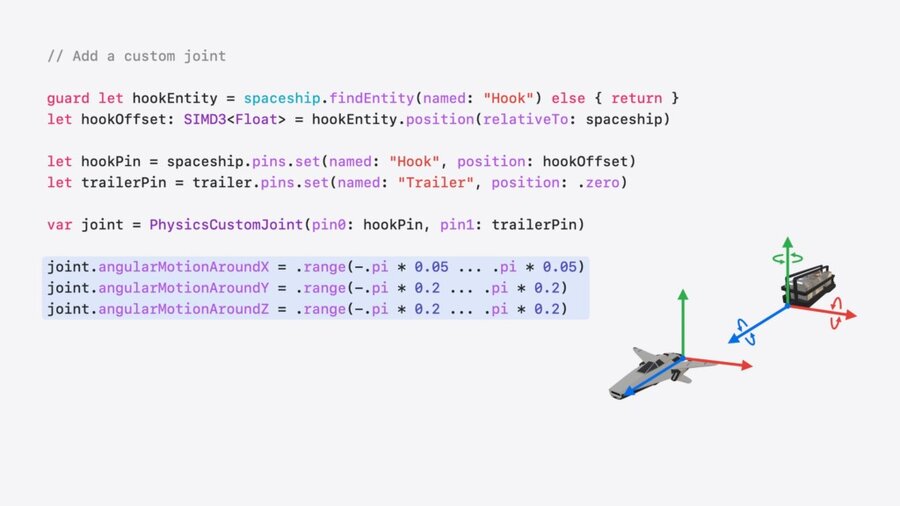
Here’s how to set a custom joint between a spaceship (where the pin is at the position of a Hook entity) and its trailer:
guard let hookEntity = spaceship.findEntity(named: "Hook") else { return }
let hookOffset: SIMD3<Float> = hookEntity.position(relativeTo: spaceship)
let hookPin = spaceship.pins.set(named: "Hook", position: hookOffset)
let trailerPin = trailer.pins.set(named: "Trailer", position: .zero)
var joint = PhysicsCustomJoint(pin0: hookPin, pin1: trailerPin)
joint.angularMotionAroundX = .range(-.pi * 0.05 ... .pi * 0.05)
joint.angularMotionAroundY = .range(-.pi * 0.2 ... .pi * 0.2)
joint.angularMotionAroundZ = .range(-.pi * 0.2 ... .pi * 0.2)
joint.linearMotionAlongX = .fixed
joint.linearMotionAlongY = .fixed
joint.linearMotionAlongZ = .fixed
try joint.addToSimulation()
Portal enhancements
Here’s how to let an object smoothly cross a portal’s surface:
portal.components.set(PortalComponent(target: portalWorld,
				     clippingMode: .plane(.positiveZ),
				     crossingMode: .plane(.positiveZ)))
spaceship.components.set(PortalCrossingComponent())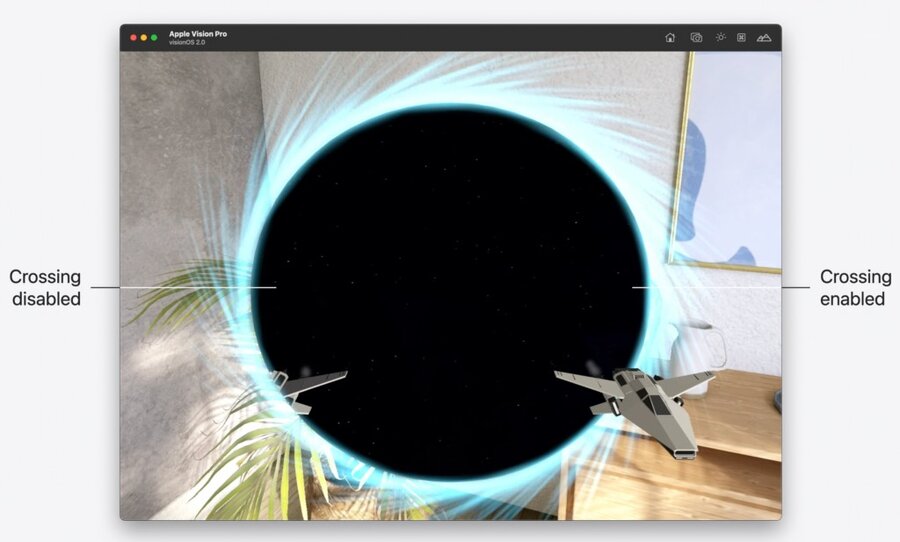
Since the lighting conditions inside and outside of the portal may differ, a harsh lighting change might occur. To avoid it, use EnvironmentLightingConfigurationComponent like this:
var lightingConfig = EnvironmentLightingConfigurationComponent()
let distance: Float = computeShipDistanceFromPortal()
lightingConfig.environmentLightingWeight = mapDistanceToWeight(distance)
spaceship.components.set(lightingConfig)