Key Takeaways
Advanced effects = composing simple pipes, not complex code
Draw with layer shaders sampling a noise texture
Animate with TimelineView, anchor with alignment guides
Presenters
Haotian Zheng, UI Frameworks Engineer
Design breakdown
Key: SwiftUI can build “advanced” effects across an app
The “advanced” lies in the construction, not the complexity
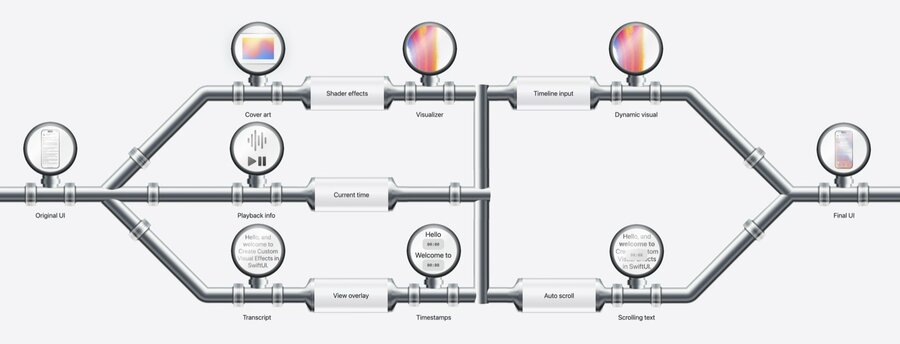
A SwiftUI app is like a pipeline: data comes in, gets transformed, and is passed along through a series of standard pipes
For Progressive disclosure, each pipe already works on its own, but you can connect them, branch them, or merge the flows to get creative
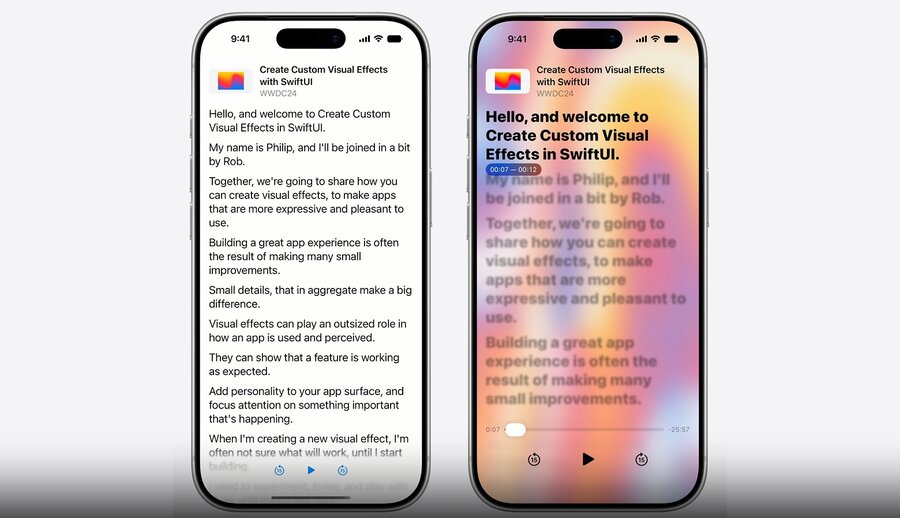
Example goal: a podcast app with a live-lyrics-style interface
animated cover art with visual effects
transcript that scrolls in sync with playback time
floating timestamp overlay on the current line
Break the design down into connected pipelines, asking not “what data do I need” but “how do I transform it”
Shader pipe: cover art image → animated visualizer
Time pipe: drive the shader animation from the playback state
Time pipe + Transcript pipe: sync the text scrolling to the current time
The final composition merges the background and foreground pipes into one effect
Advanced graphics
Full-screen cover art
The cover art sits behind the transcript, so soften it with a
.blurmodifier so it doesn’t compete with the foreground
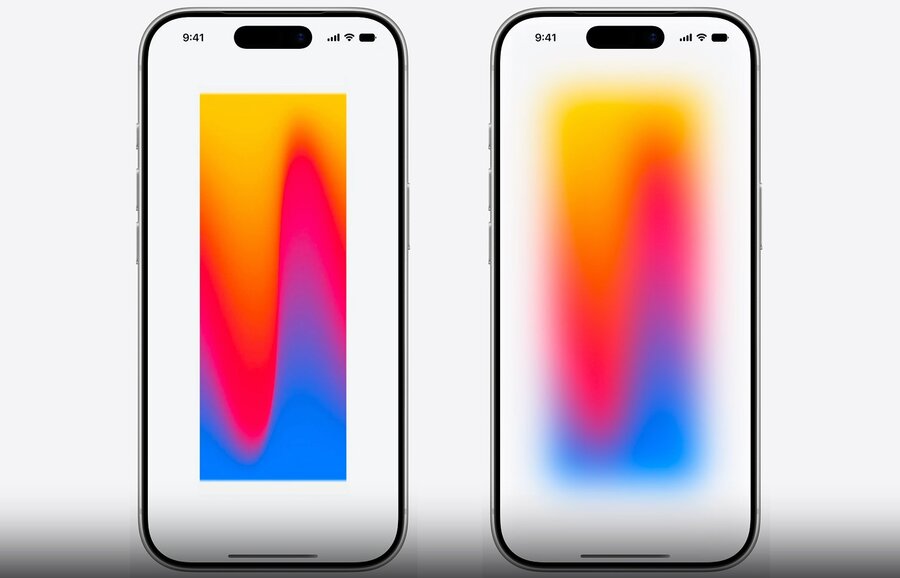
Image("CoverArt")
    .blur(radius: 30)
Shader effect
An icon starts as a vector, then the GPU rasterizes it to pixels
A shader is a program that runs on the GPU to decide which color fills each pixel
Shader functions run in parallel
A Metal shader can be called from SwiftUI’s shader effect APIs
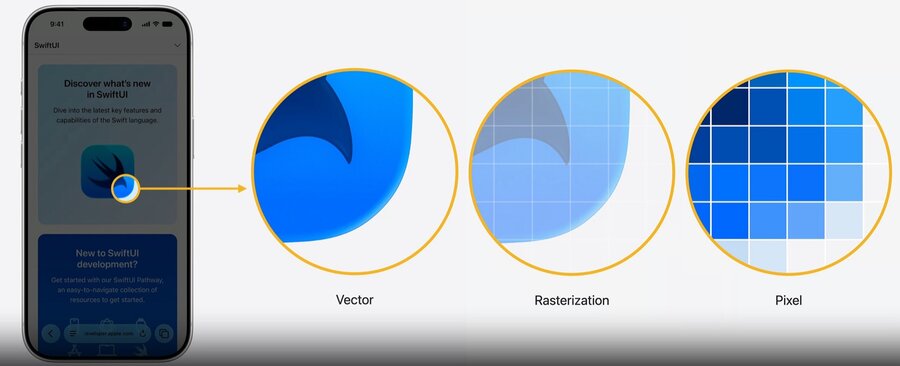
Shader effects have three types:
colorEffect: given each pixel’s position and original color, return a new color (e.g. turn an image black and white)distortionEffect: given a position, return a new position for SwiftUI to sample from (e.g. geometric effects like shear)layerEffect: most flexible, provides the whole view’s layer so you can sample adjacent pixels or the entire region (e.g. blur)
[[ stitchable ]] half4 colorEffectFunction(float2 position, half4 color, args ...)
[[ stitchable ]] float2 distortionEffectFunction(float2 position, args ...)
[[ stitchable ]] half4 layerEffectFunction(float2 position, SwiftUI::Layer layer, args ...).layerEffect(): pass in the view size and a noise textureShader samples the noise to offset each pixel’s sampling position
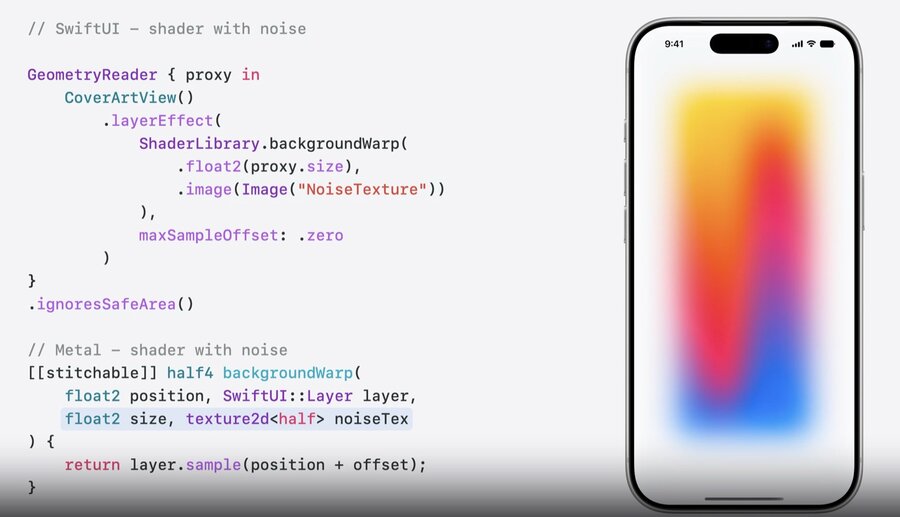
uv = position / size: the normalized coordinate telling where in the image the current pixel isSample the noise texture at
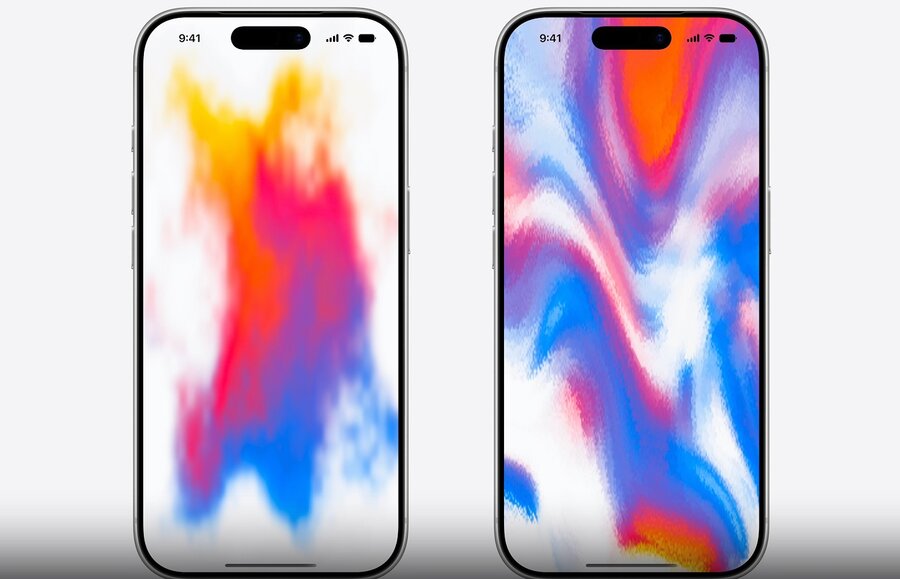
uv, then turn that value into anoffsetthat shifts where the layer is sampledDomain warping: instead of one noise sample, sample it twice
the first sample gives an initial offset
sample the noise again at a position shifted by that offset
this layered-noise technique produces organic, flowing blobs
// Metal - shader with noise
[[stitchable]] half4 backgroundWarp(
    float2 position, SwiftUI::Layer layer,
    float2 size, texture2d<half> noiseTex
) {
    constexpr sampler s(address::repeat, filter::linear);
    float2 uv = position / size;

    half4 n = noiseTex.sample(s, uv);

    // domain warping
    float2 q = float2(n.r, n.g);
    n = noiseTex.sample(s, uv + q);

    float2 offset = (float2(n.r, n.g) - 0.5) * 200.0;

    return layer.sample(position + offset);
}
Time-driven animation
Shaders are stateless: no memory of the previous frame, output depends only on the parameters
To animate, pass in a value that changes over time
TimelineView(.animation)is that pipe: it fires every frame with a timestampPass the elapsed time into the shader and add it to the noise sample position, so the pattern flows
@State private var startDate = Date.now

TimelineView(.animation) { timeline in
    let elapsed = timeline.date.timeIntervalSince(startDate)
    CoverArtView()
        .layerEffect(
            ShaderLibrary.backgroundWarp(
                .float2(proxy.size),
                .image(Image("NoiseTexture")),
                .float(elapsed)
            ),
            maxSampleOffset: .zero
        )
}
Time-synced scroll view
Add time to the transcript so the current line is highlighted and centered
Use the playback timestamp to decide the current line: it is bold and clear, the rest fade back
With
onChangemonitoring the current line,scrollTo(_:anchor: .center)keeps it centered
@State private var playback = PlaybackState()

ScrollViewReader { scrollProxy in
    ScrollView {
        LazyVStack(alignment: .leading, spacing: 12) {
            ForEach(sampleTranscript) { line in
                Text(line.text)
                    .transcriptLineStyle(isCurrent:
                        line.id == playback.currentLineIndex
                    )
            }
        }
    }
    // monitor the current line change
    .onChange(of: playback.currentLineIndex, { _, i in
        scrollProxy.scrollTo(i, anchor: .center)
    })
}
Floating-view attachment
Every line keeps a timestamp overlay, but only the current line’s is shown, so it never interferes with layout
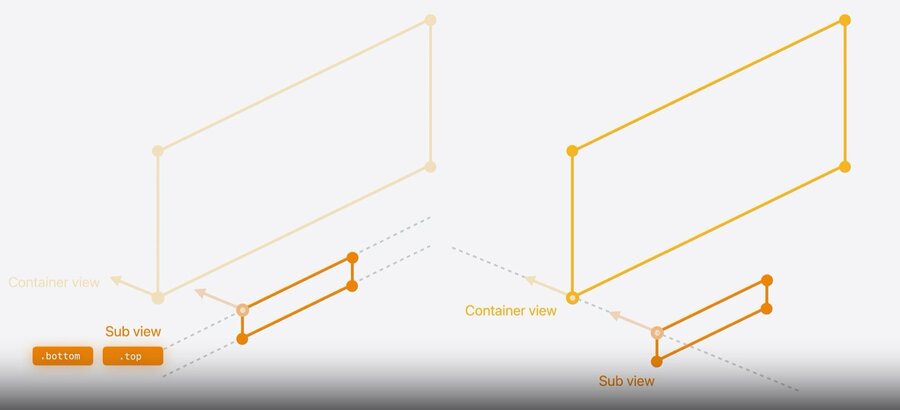
offsetcan’t place a sub view on the container’s edge without knowing both views’ sizesEvery view has an alignment: the point (on both axes) the layout system uses to position it
An overlay aligns the container and sub view by their alignment points (default
.center), like a pin through both
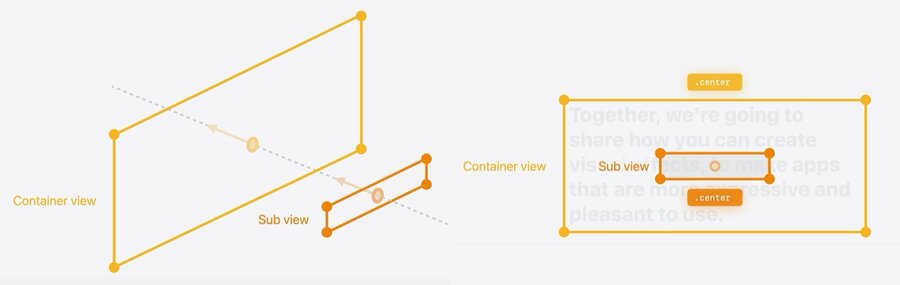
Text(line.text) // Container View
    .overlay {
        Text(line.formattedTimestamp) // Sub View
    }
Use
alignmentGuideto override an alignment: move the sub view’s.bottomguide to its own.topedgeThe pin then follows that point, so it sits on the edge with a purely semantic override, no manual offsetting
Text(line.text) // Container View
    .overlay(alignment: .bottomLeading) {
        Text(line.formattedTimestamp) // Sub View
            .alignmentGuide(.bottom) { $0[.top] }
    }