
Key Takeaways
Adopt SwiftUI incrementally in AppKit and UIKit apps
@Observable auto-updates AppKit and UIKit views
Host SwiftUI with NSHostingView, menus, and scenes
Bring AppKit gestures into SwiftUI
Presenters
David Nadoba, UI Frameworks
Observation in AppKit
Problem: when a value changes it should also affect the appearance of the other sliders, but AppKit does not redraw on its own, so you would normally have to invalidate views by hand
AppKit (and UIKit) now support automatic Observation of properties from
@Observabletypesadd the
@Observablemacro to a class, and all its mutable properties join the observation systemAppKit tracks each property read during drawing and redraws whenever any of them change, so no more manual
needsDisplay = true
// AppKit manual invalidation
final class ColorPicker: NSViewController {
    let model = ColorModel()
    let hueSlider: NSSlider
    let saturationSlider: NSSlider
    let brightnessSlider: NSSlider

    @objc func hueChanged(_ sender: NSSlider) {
        model.hue = sender.doubleValue
        saturationSlider.needsDisplay = true
        brightnessSlider.needsDisplay = true
    }

    @objc func saturationChanged(_ sender: NSSlider) { ... }
    @objc func brightnessChanged(_ sender: NSSlider) { ... }
}
// Observation in AppKit
@Observable
final class ColorModel {
var hue: Double = 1.0
var saturation: Double = 1.0
var brightness: Double = 1.0
}
class HueSlider: NSSliderCell {
let model: ColorModel
override func drawKnob(_ knobRect: NSRect) {
let hue = model.hue
let brightness = model.brightness
let saturation = model.saturation
// Draw knob
}
override func drawBar(inside rect: NSRect, flipped: Bool) { ... }
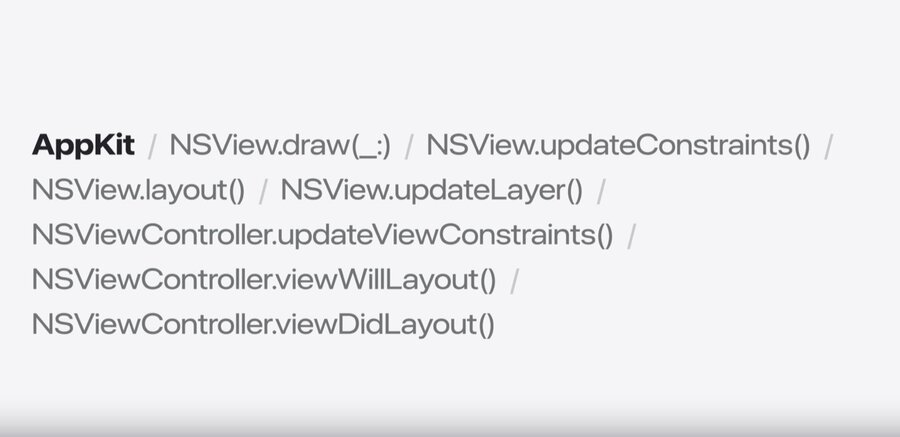
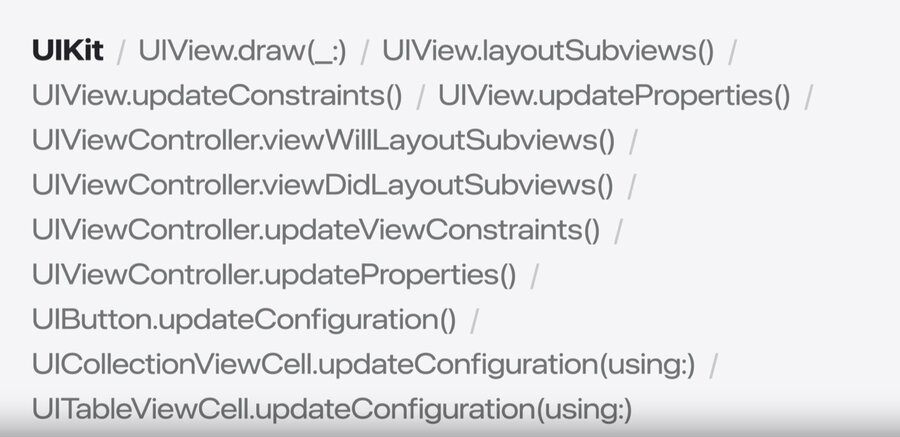
}NSView.draw(_:)is not the only method that supports observationupdateConstraints(),layout(),updateLayer(), and theNSViewControllerequivalents also participateUIKit reaches even further, beyond
UIView/UIViewControllertoUIButton,UICollectionViewCell, and more
Deployment
back deploy to macOS 15 with
NSObservationTrackingEnabled: YESin Info.plistback deploy to iOS 18 with
UIObservationTrackingEnabled: YESin Info.plistenabled by default in the 2026 releases and later
Learn more about Observation tracking in UIKit: Whats new in UIKit
Hosting SwiftUI in AppKit
Rewriting a component is a good time to move it to SwiftUI, especially when the drawing and interaction code would change completely anyway
Here the color picker is rebuilt as a circular SwiftUI view that reads the same
@Observablemodel
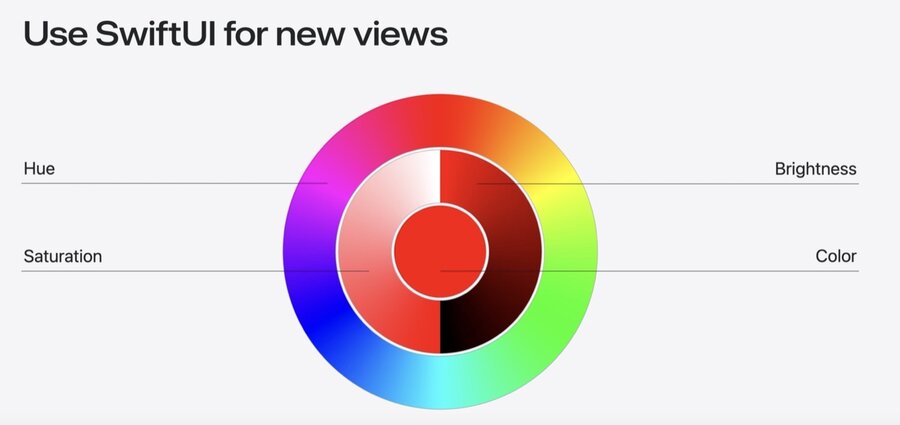
Canvasgives an immediate mode drawing API, similar todraw(_:)each redraw calls the closure with a fresh
GraphicsContextissue draw commands (strokes, fills, transforms, filters) directly against it
reuse existing Core Graphics drawing code with
context.withCGContext { ... }
Learn more about Canvas: Add rich graphics to your SwiftUI app
Combine SwiftUI with your own Metal shaders: Compose advanced graphics effects with SwiftUI
// Circular color picker
struct HSBColorPicker: View {
    var model: ColorModel

    var body: some View {
        Canvas { context, size in
            let hue = model.hue
            let saturation = model.saturation
            let brightness = model.brightness
            // Draw color picker
        }
        .contentShape(Circle())
        .gesture(makeDragGesture())
    }
}
Embed the SwiftUI view with
NSHostingView, anNSViewsubclass that wraps a SwiftUI hierarchy (UIHostingControlleron UIKit)add it to the existing hierarchy like any other view, and pass the shared model in
because the model is
@Observable, changes keep both the SwiftUI view and the surrounding AppKit views in sync
import AppKit
import SwiftUI

NSStackView(views: [
    NSHostingView(
        rootView: HSBColorPicker(model: model)
    ),
    AnimationPickerView(),
    ...
])AppKit gestures in SwiftUI
Reuse an existing
NSGestureRecognizerin a SwiftUI view by wrapping it in anNSGestureRecognizerRepresentablemakeNSGestureRecognizer(context:)creates the recognizerhandleNSGestureRecognizerAction(_:context:)responds to it, here resetting the model
// Mix NSGestureRecognizer with SwiftUI
struct ForceClickReset: NSGestureRecognizerRepresentable {
    var model: ColorModel

    func makeNSGestureRecognizer(
        context: Context
    ) -> ForceClickGestureRecognizer {
        ForceClickGestureRecognizer()
    }

    func handleNSGestureRecognizerAction(
        _ recognizer: ForceClickGestureRecognizer,
        context: Context
    ) {
        model.saturation = 1.0
        model.brightness = 1.0
    }
}
Attach it like any other SwiftUI gesture with
.gesture(...)
// Use NSGestureRecognizer in SwiftUI
struct HSBColorPicker: View {
    var model: ColorModel

    var body: some View {
        Canvas { context, size in
            let hue = model.hue
            let saturation = model.saturation
            let brightness = model.brightness
            // Draw color picker
        }
        .contentShape(Circle())
        .gesture(makeDragGesture())
        .gesture(ForceClickReset(model: model))
    }
}
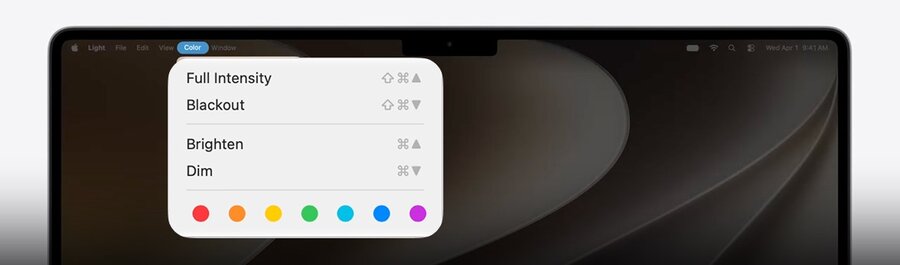
SwiftUI in the main menu
Build menu content as a SwiftUI view using familiar building blocks like
Button,Picker,.keyboardShortcut, and.pickerStyle
struct ColorMenu: View {
    var model: ColorModel

    var body: some View {
        Button("Full Intensity") {
            withAnimation {
                model.brightness = 1
                model.saturation = 1
            }
        }
        .keyboardShortcut(.upArrow, modifiers: [.command, .shift])

        // More Buttons

        Picker( ... )
            .pickerStyle(.palette)
    }
}
Embed it in the menu bar with
NSHostingMenu, then set it as a menu item’s submenu
extension AppDelegate {
    func setupMainMenu() {
        let mainMenu = NSMenu()
        // ...
        let colorMenu = NSHostingMenu(
            rootView: ColorMenu(model: colorModel)
        )
        colorMenu.title = "Color"

        let colorMenuItem = NSMenuItem()
        colorMenuItem.submenu = colorMenu
        mainMenu.addItem(colorMenuItem)
    }
}
SwiftUI scenes in AppKit
Add complete SwiftUI scenes (e.g. a Settings window or a menu bar extra) without changing your app delegate based architecture
Group the scenes in an
NSHostingSceneRepresentation, register them withNSApplication.shared.addSceneRepresentation(...), and drive them throughscenes.environment(e.g.openSettings())
class AppDelegate: NSObject, NSApplicationDelegate {
    let model = AppModel()
    var openSettingsAction: (() -> Void)?

    func applicationWillFinishLaunching(
        _ notification: Notification
    ) {
        let scenes = NSHostingSceneRepresentation {
            LightMenuBarExtra(appModel: model)
            LightSettings(appModel: model)
        }
        NSApplication.shared
            .addSceneRepresentation(scenes)
        openSettingsAction = {
            scenes.environment.openSettings()
        }
    }

    @IBAction func openSettings(_ sender: Any?) {
        openSettingsAction?()
    }
}
Learn more: Bring multiple windows to your SwiftUI app
