Presenter Overlay
Elevates the presenters presence by including presenter on top of shared content
Small overlay: Places presenter in a movable window
Large overlay: Separates the presenters face & body from the background & layers screen content between them (more immersive)
Overlay integrated in
SCStream– video menu bar will show automatically, user controls sharing there
User can control the stream there & customize things like camera / microphone effects
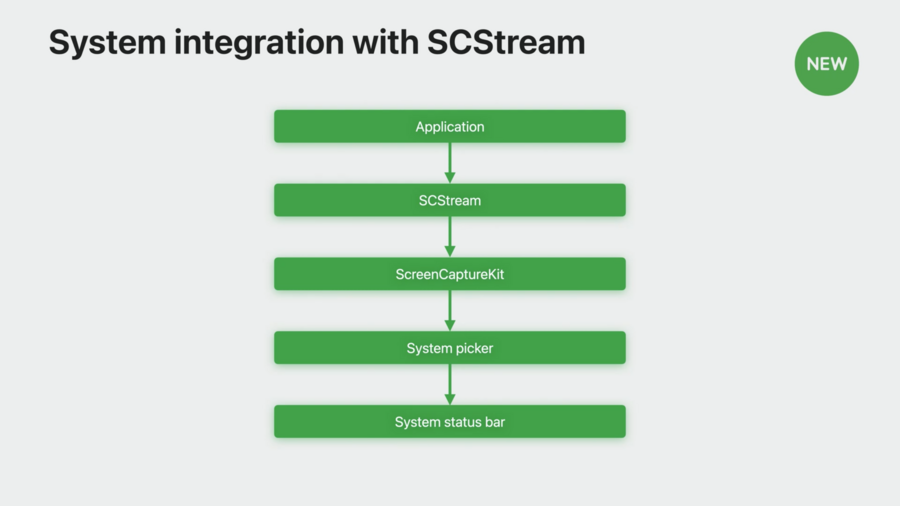
Currently content frames sent to its process from ScreenCaptureKit
Now when camera is started overlay available in video menu item
ScreenCaptureKit will take the camera and apply the rendering to the selected stream – composite frames are automatic
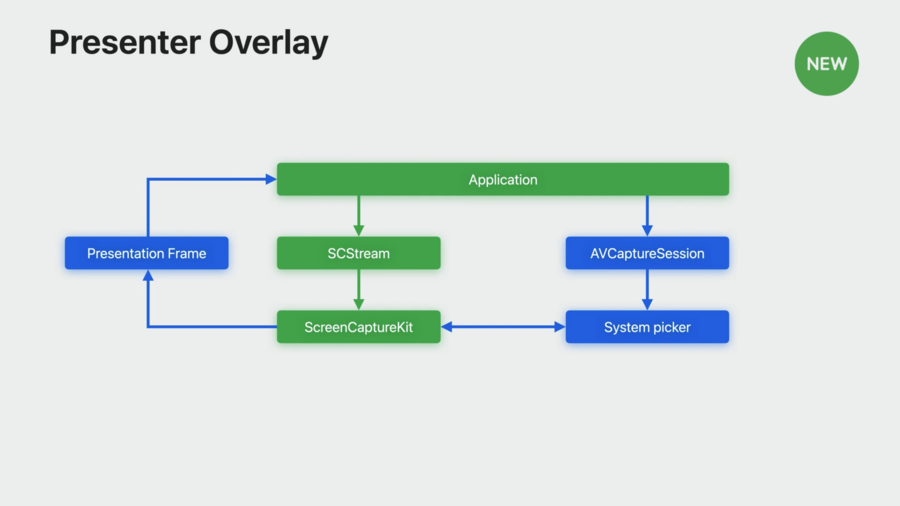
Apps get notified about presenter overlay started/stopped via
SCStreamdelegate methodstream(_:outputEffectDidStart:)Considerations to take: Hide camera view when turned on, update app UI, optimize experience (higher frame rates)
Screen sharing picker
SCContentFilterfromSCShareableContentused, new: get content filter from the pickerContent can now also be picked from window menu directly
New
SCContentSharingPickeracts as interface between app and OSBuilt-in system-level content picker
Comes with per-stream customization
Usage example:
// Set up content sharing picker instance
let picker = SCContentSharingPicker.shared()
picker.addObserver(self)
picker.active = true

// show system level picker button
func showSystemPicker(sender: UIButton!) {
    picker.present(for stream: nil, using contentStyle:.window)
}

// observer call back for picker
func contentSharingPicker(_ picker: SCContentSharingPicker, didUpdateWith filter:
SCContentFilter, for stream: SCStream?) {
   if let stream = stream {
        stream.updateContentFilter(filter)
    } else {
        let stream = SCStream(filter: filter, configuration: config, delegate: self)
    }
}
There are also
didFailWith erroranddidCancel for streamdelegate methodsUse
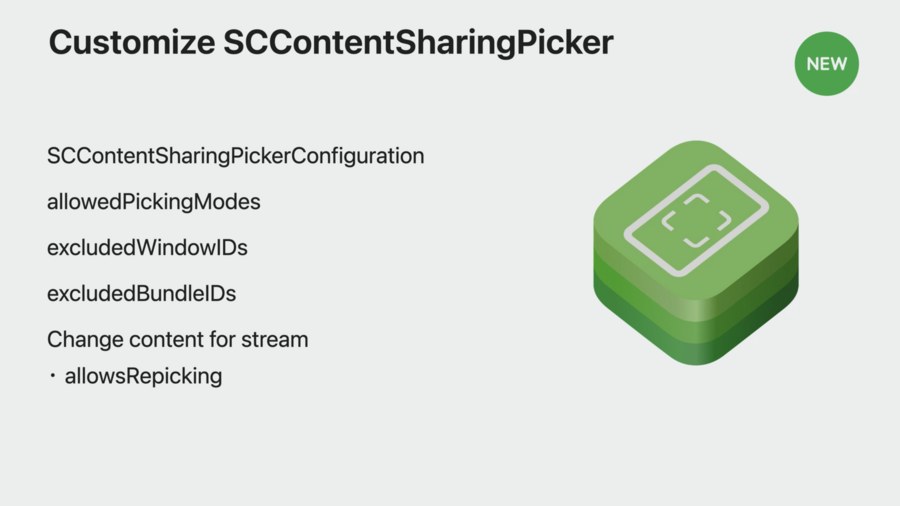
SCContentSharingPickerConfigurationwith options likeexcludedBundleIDsorallowsRepickingto configure
Screenshot
Features like advanced rendering by app or window, multiple pixel formats & color spaces, cursor visibility etc. are available
New API is asynchronous, choose between
CMSampleBuffer(has format options) andCGImageSimilar options & setup flow as screen capture
Transition from
CGWindowListCreateImageby using options inSCStreamConfigurationList options provided in
SCShareableContentThere’s a
CGImageoutput format to migrateTo start, use
SCShareableContentwithSCContentFilterandSCStreamConfigurationThen call
SCScreenshotManager.captureScreenshotclass method to receive a screenshotYou can also use the new system picker to create the
SCContentFilterinstead ofSCShareableContent
Taking a screenshot:
// Don't forget to customize the content you want in your screenshot
// Use SCShareableContent or SCContentSharingPicker to pick your content
let display = nil;

// Create your SCContentFilter and SCStreamConfiguration
// Customize these lines to use the content you want and desired config options
let myContentFilter = SCContentFilter(display: display,
                             excludingApplications: [],
                             exceptingWindows: []);
let myConfiguration = SCStreamConfiguration();

// Call the screenshot API and get your screenshot image
if let screenshot = try? await SCScreenshotManager.capture<#SampleBuffer|Image#>(contentFilter: myContentFilter, configuration:
                                                       myConfiguration) {
    print("Fetched screenshot.")
} else {
    print("Failed to fetch screenshot.")
}