Meet SwiftUI for spatial computing
 Rony Fadel
Description: Take a tour of the solar system with us and explore SwiftUI for visionOS! Discover how you can build an entirely new universe of apps with windows, volumes, and spaces. We’ll show you how to get started with SwiftUI on this platform as we build an astronomy app, add 3D content, and create a fully immersive experience to transport people to the stars.
Introduction
- When building an app for spatial computing: the best way to build it is with SwiftUI.
- New capabiltes such as Volumes and new 3D gestures, effects and layouts only exist in SwiftUI.
- The visionOS system has been built from the ground up with SwiftUI (e.g. buttons, toggles, Home View, Control Centre)
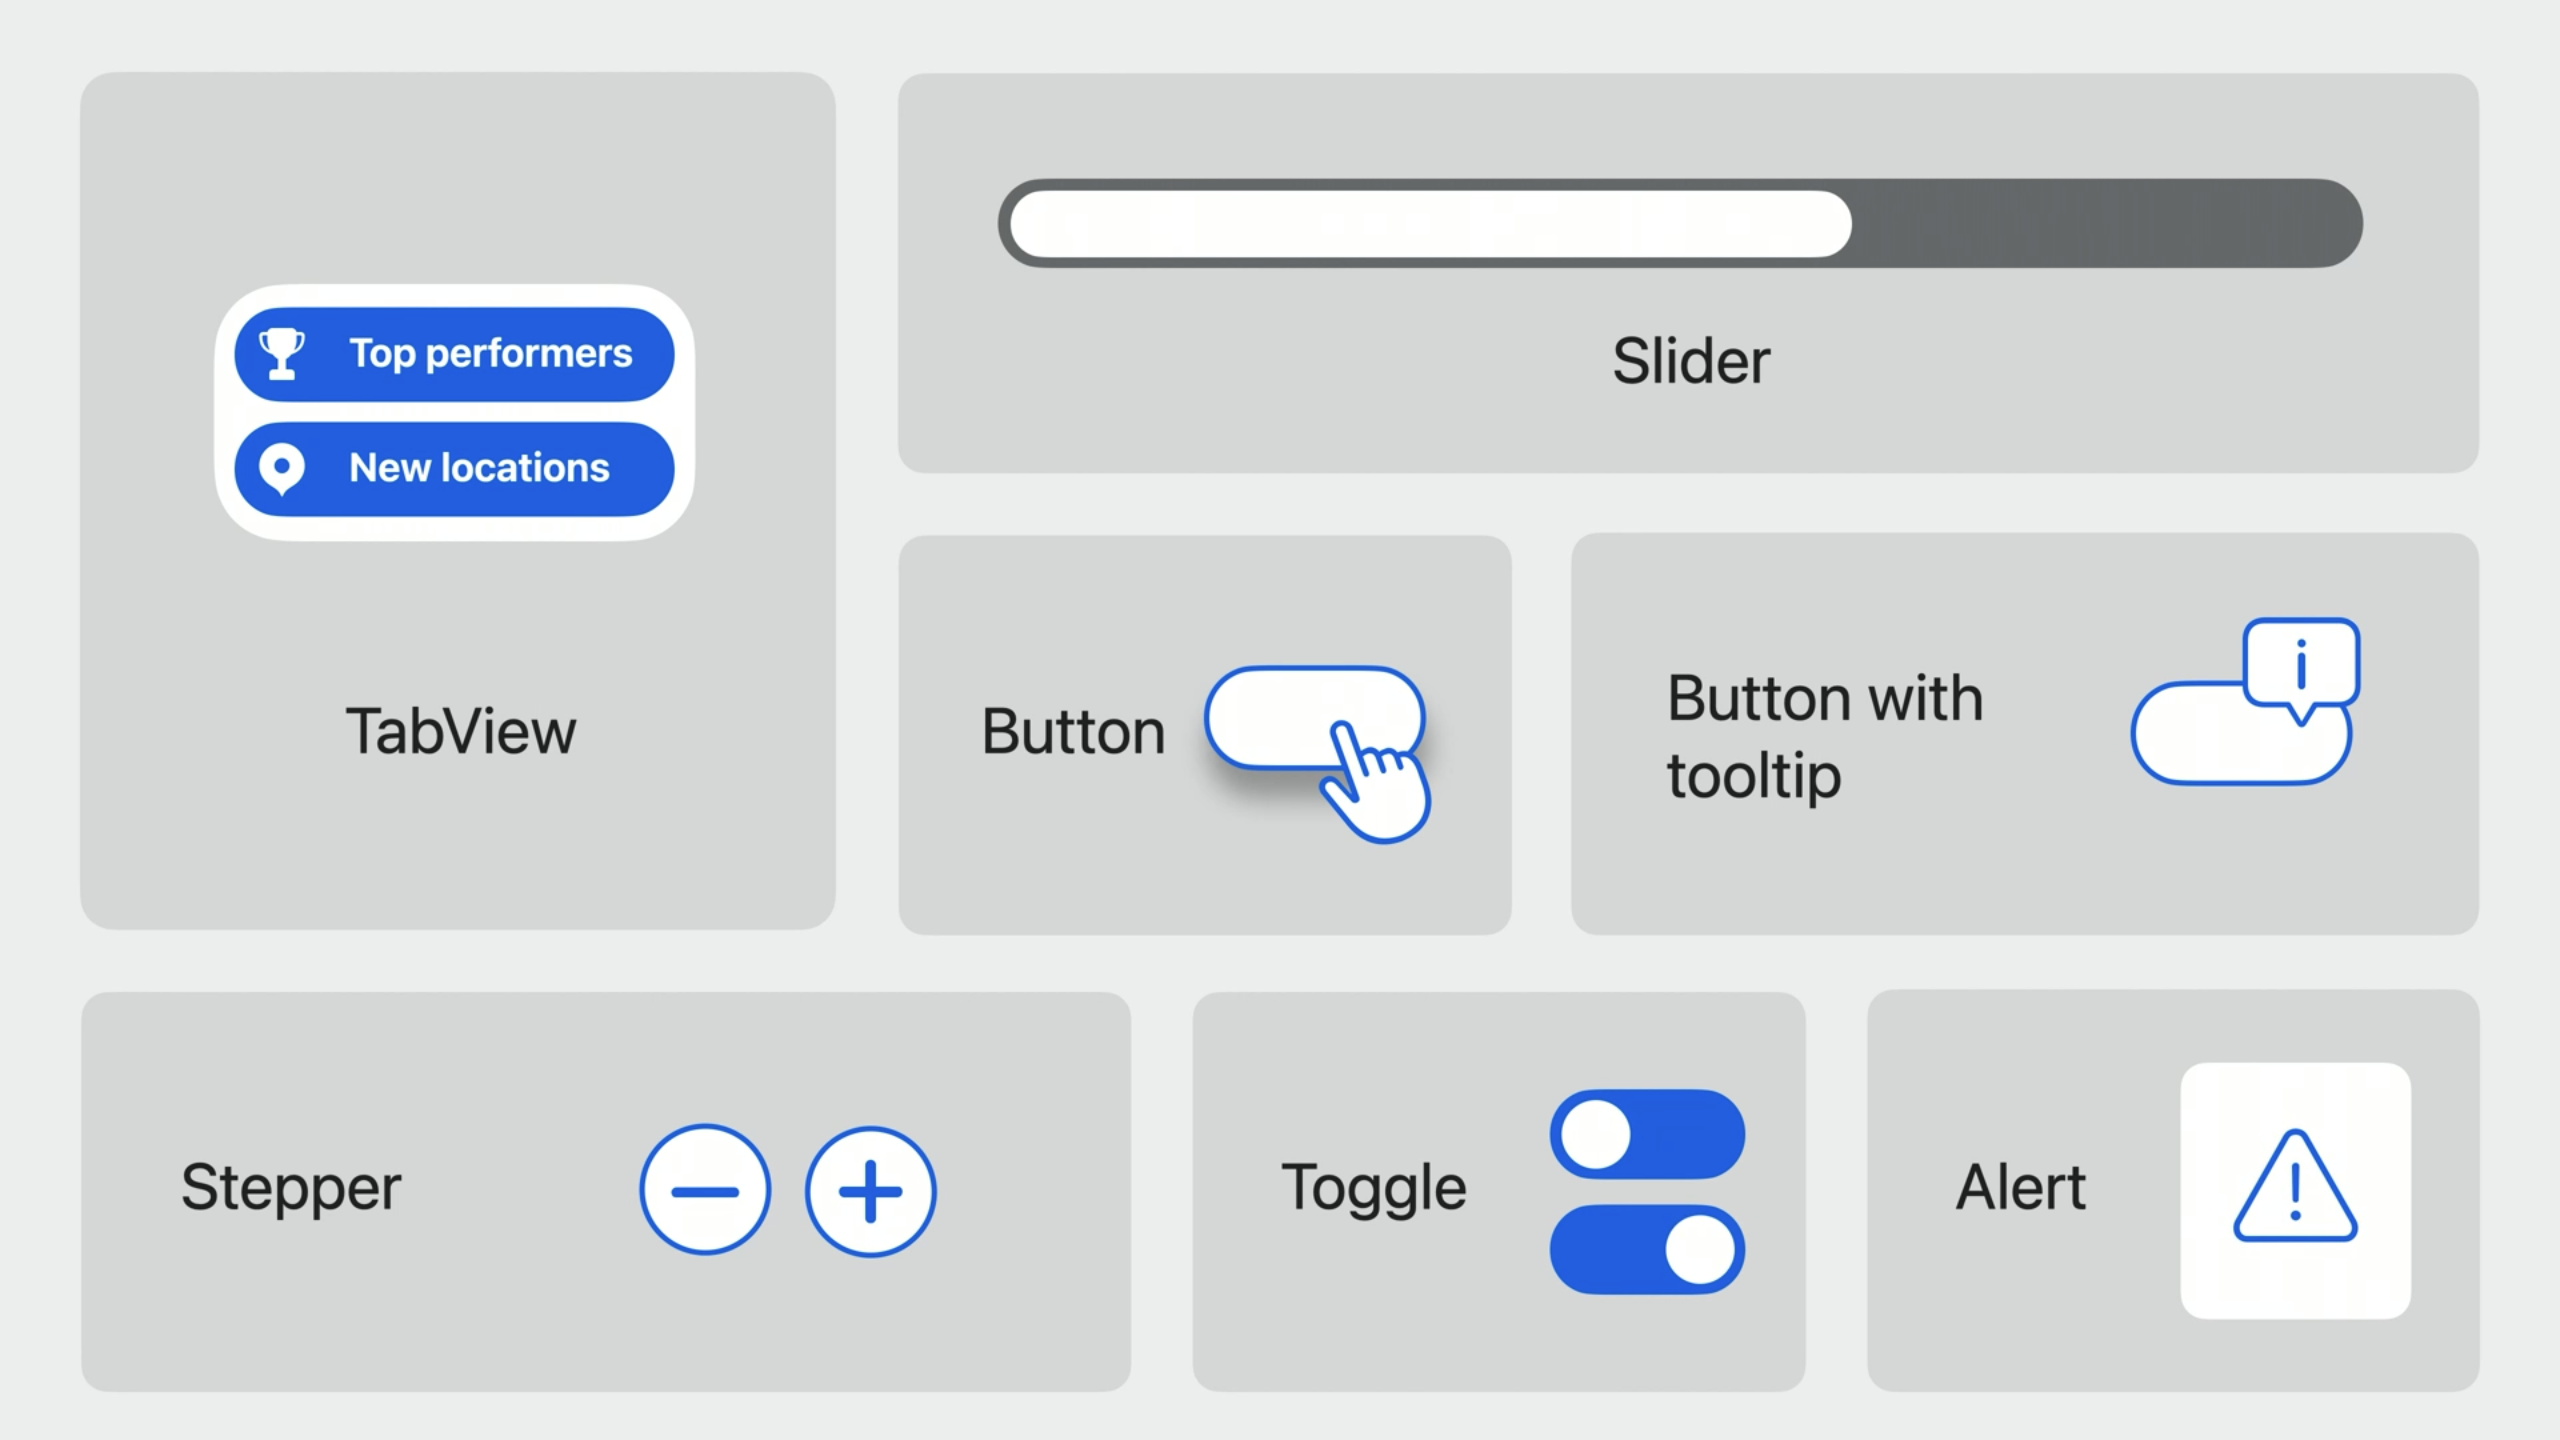
- SwiftUI elements adapt to the idioms of visionOS:
- bordered buttons use a vibrant material background.
- all buttons gain a rich hover effect that react to your eyes, hands and to pointer input.
- buttons can automatically display a tooltip when you look at them.
- TabView hangs by the side of your app.
- TabView expands to display more detail just by looking at it.
Scenes
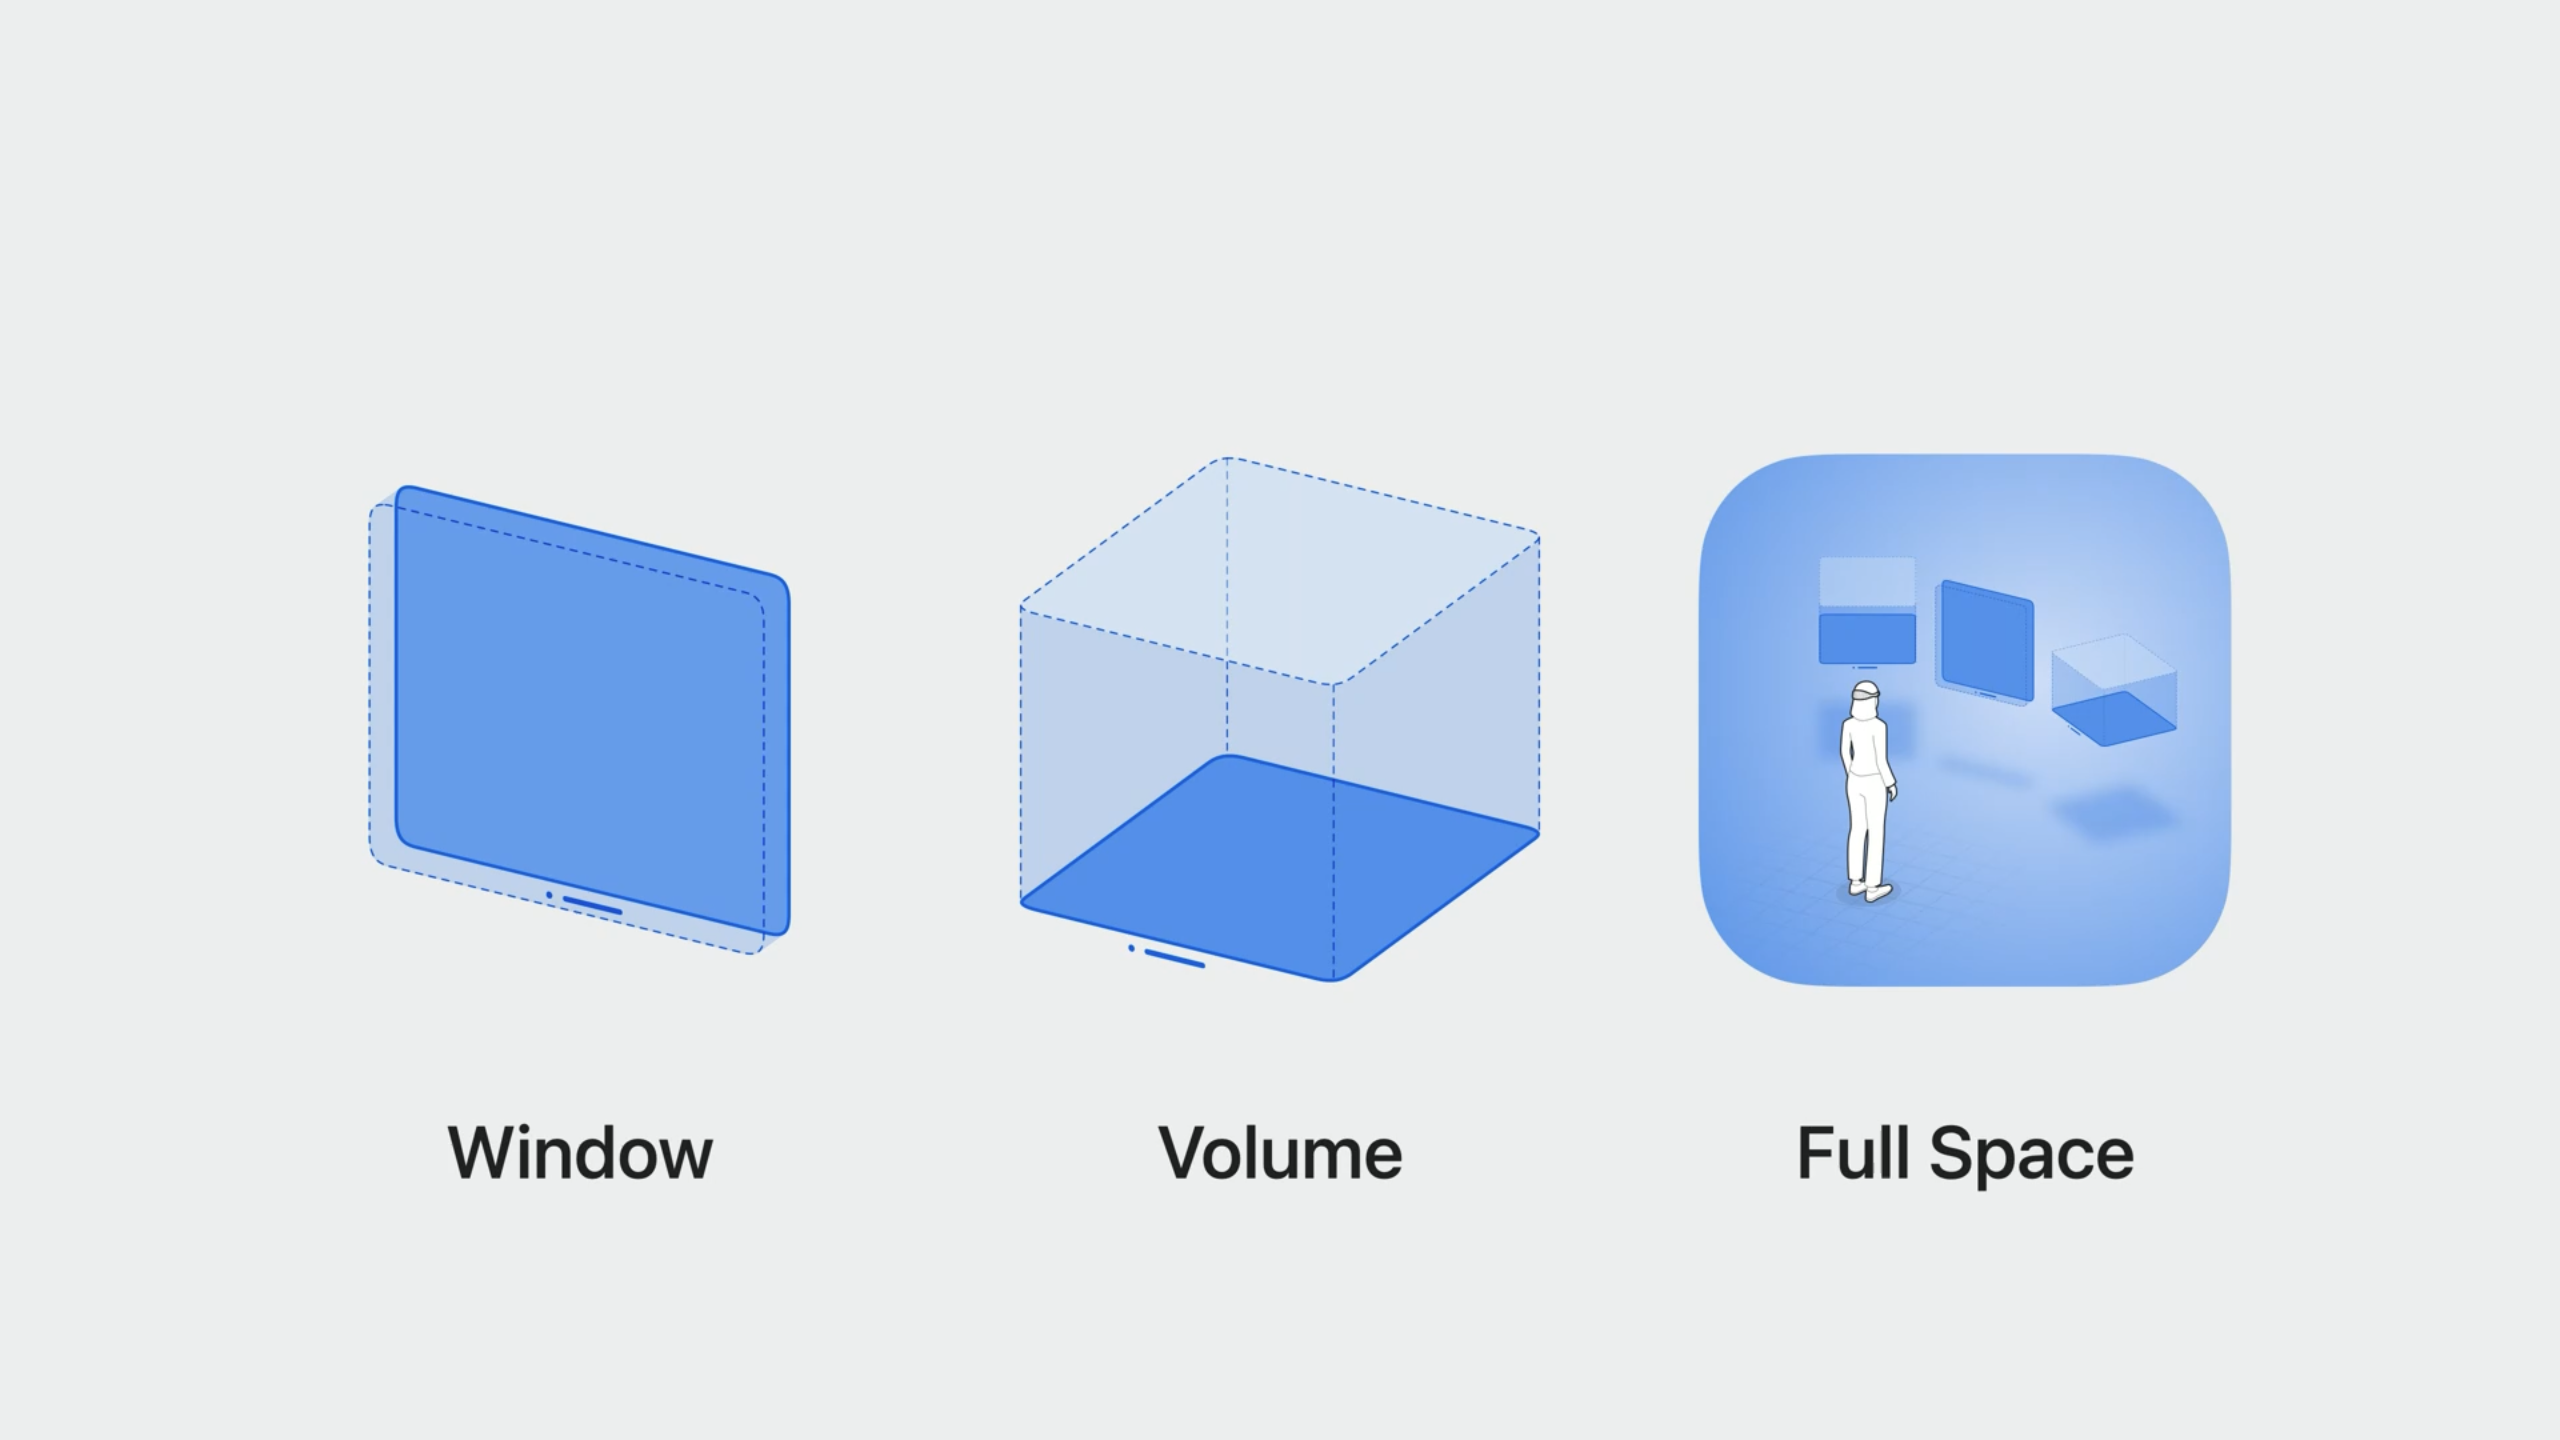
With spatial computing, there are 3 types of scenes that make up an app: * Windows: great for building traditional and familiar interfaces (e.g. Safari, Freeform), and menus that lead into more immersive experiences (e.g. Mindfulness)
- Volumes: a new 3D window style: for displaying objects and experiences in a bounded space.
- Full Spaces: app gets complete control, hiding windows from other apps.
Window
Ornaments
New concept added to SwiftUI: Ornaments.
Ornaments allow you to add accessory views relative to your app's window. They can even extend outside the window's bounds.
Create your own ornament using the .ornament modifier.
Materials
No dark or light appearance on visionOS. Materials do the hard work for you.
Secondary foreground style (.foregroundStyle(.secondary)) automatically uses a new vibrant treatment within its background material to increase visual weight.
Interaction
- Eyes: Look at an element and use an indirect pinch gesture.
- Hands: reaching out and touching apps.
- Pointer: trackpad, hand gesture or hardware keyboard.
- Accessibility: e.g. VoiceOver, Switch Control.
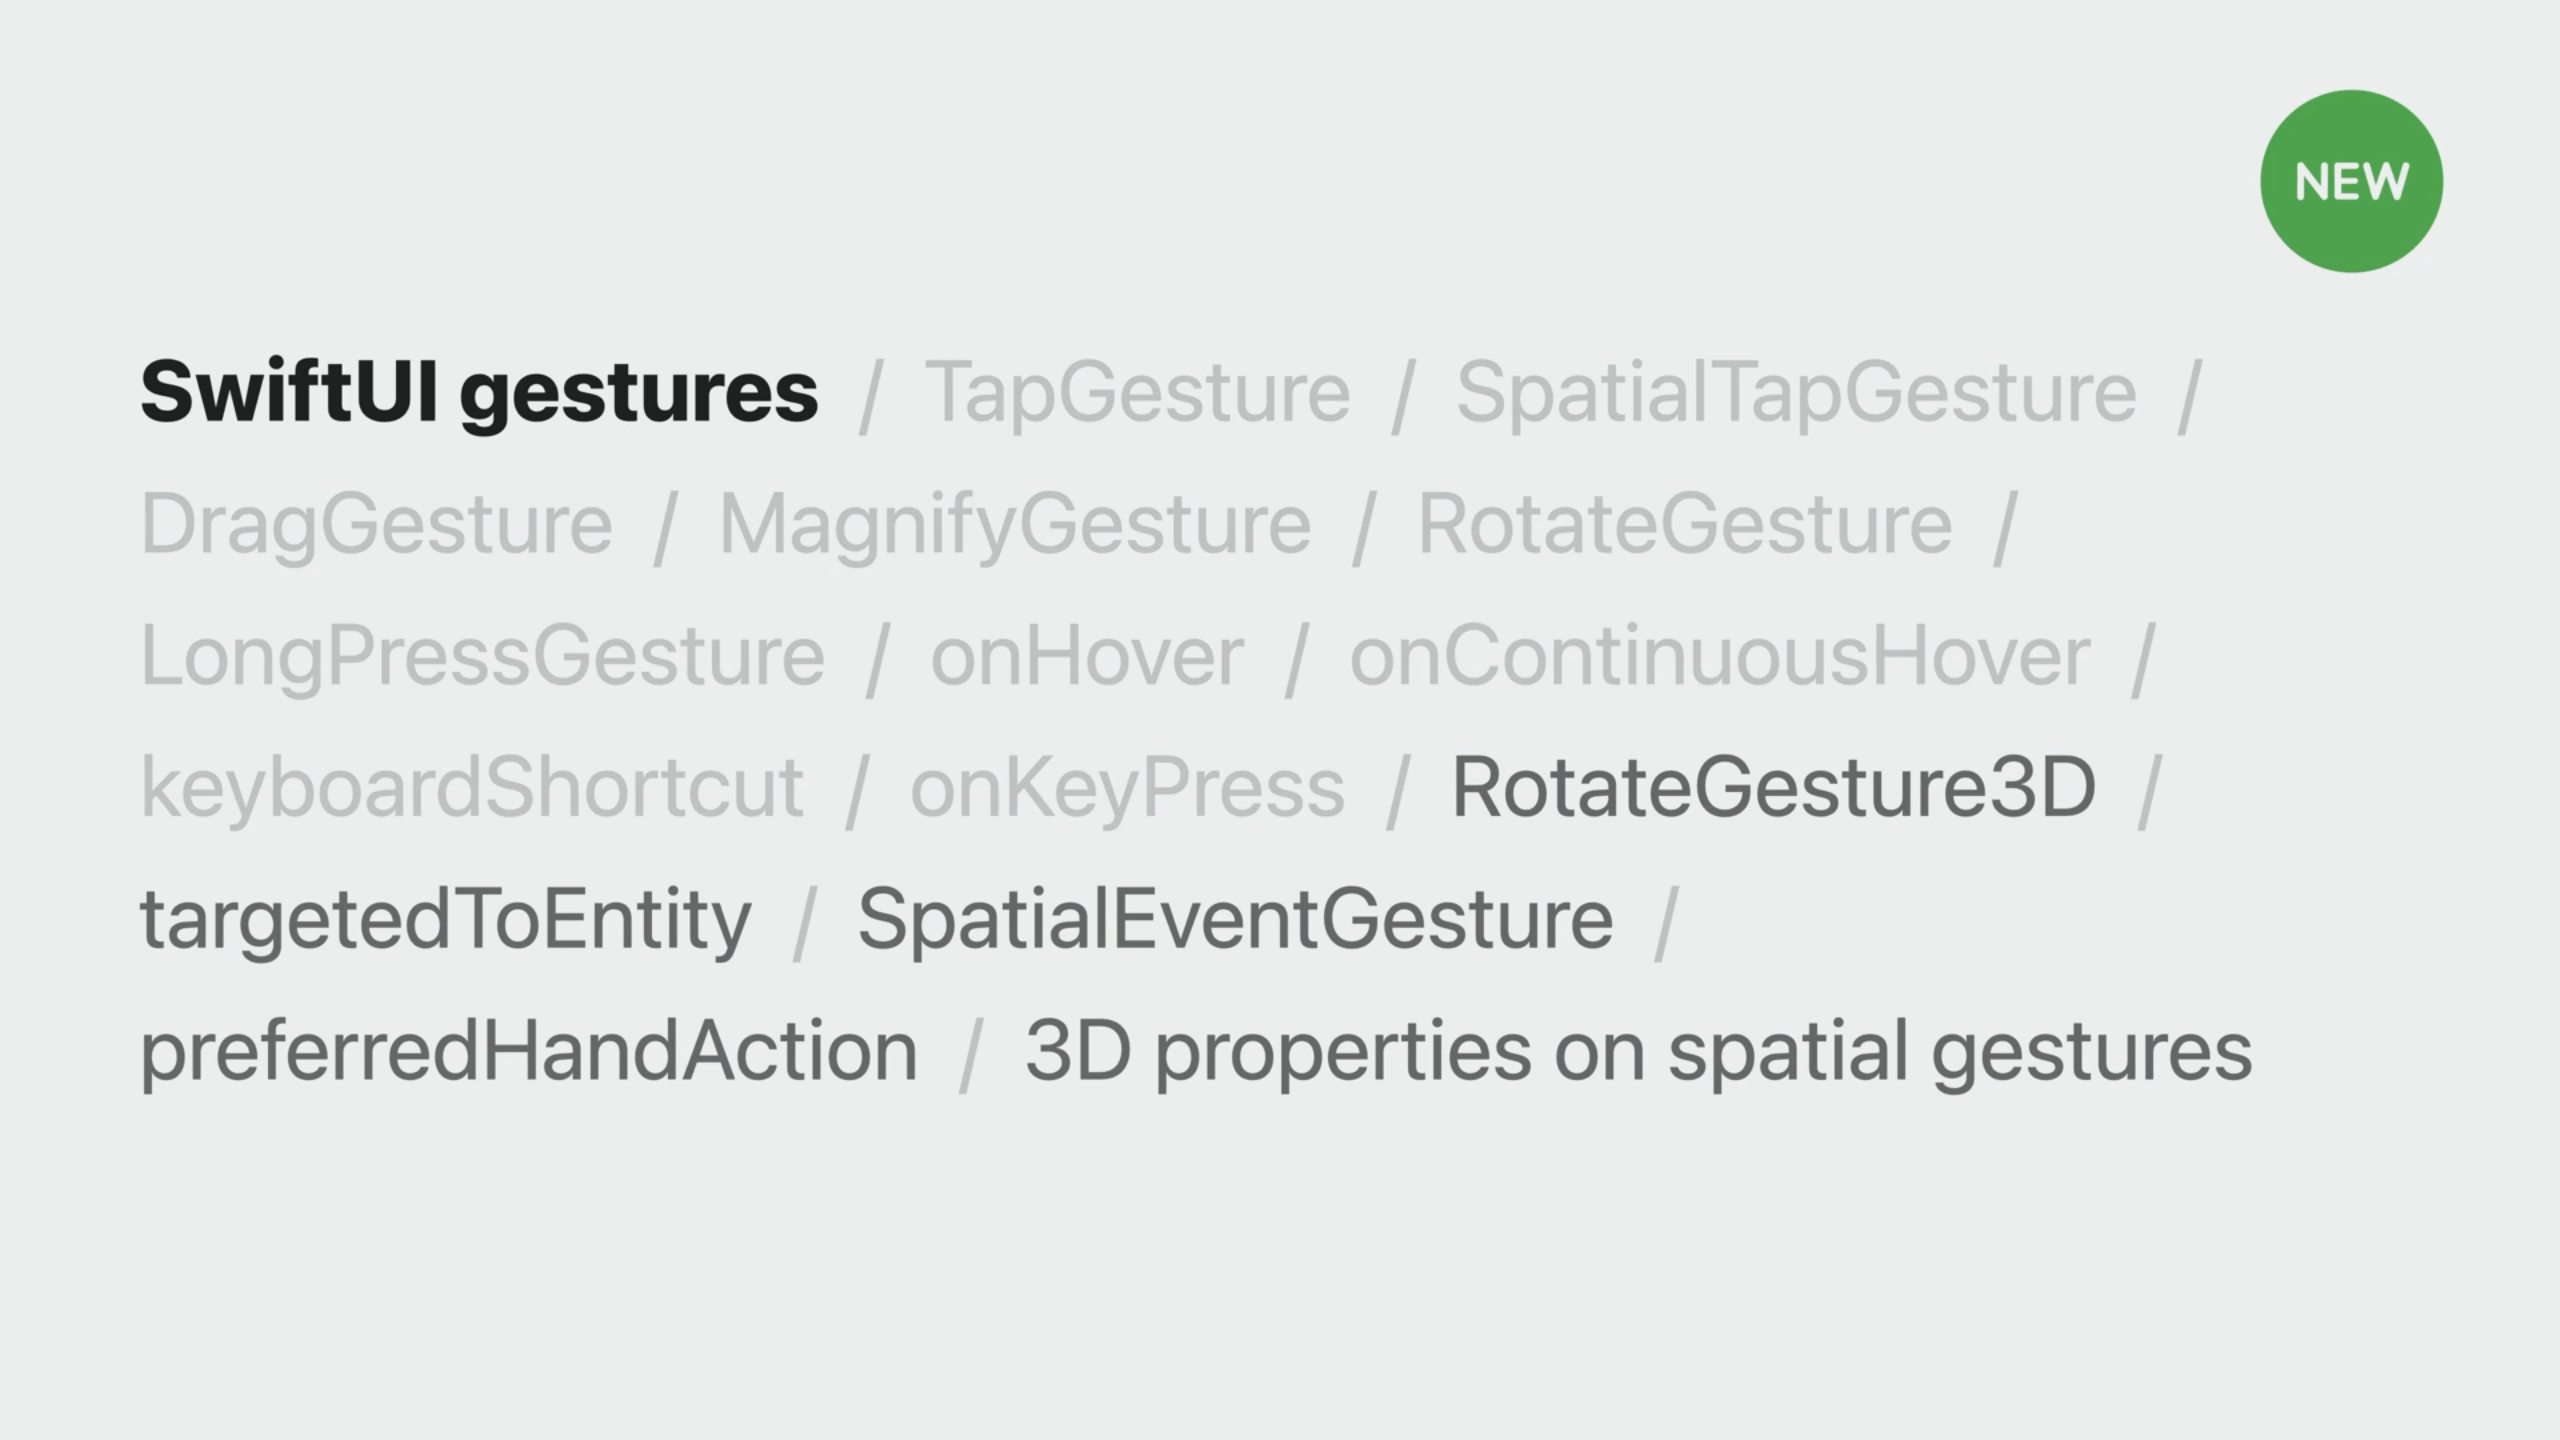
New gestures added to SwiftUI, like RotateGesture3D.
Hover effects
- Critical to making your app responsive.
- Run outside of your app's process.
- Added automatically to most controls.
- If you're using a custom control style, make sure to add hover effects to make them responsive and easy to use.
Volumes
- To add a volume, specify
.windowStyle(.volumetric)on yourWindowGroup.
Model3D
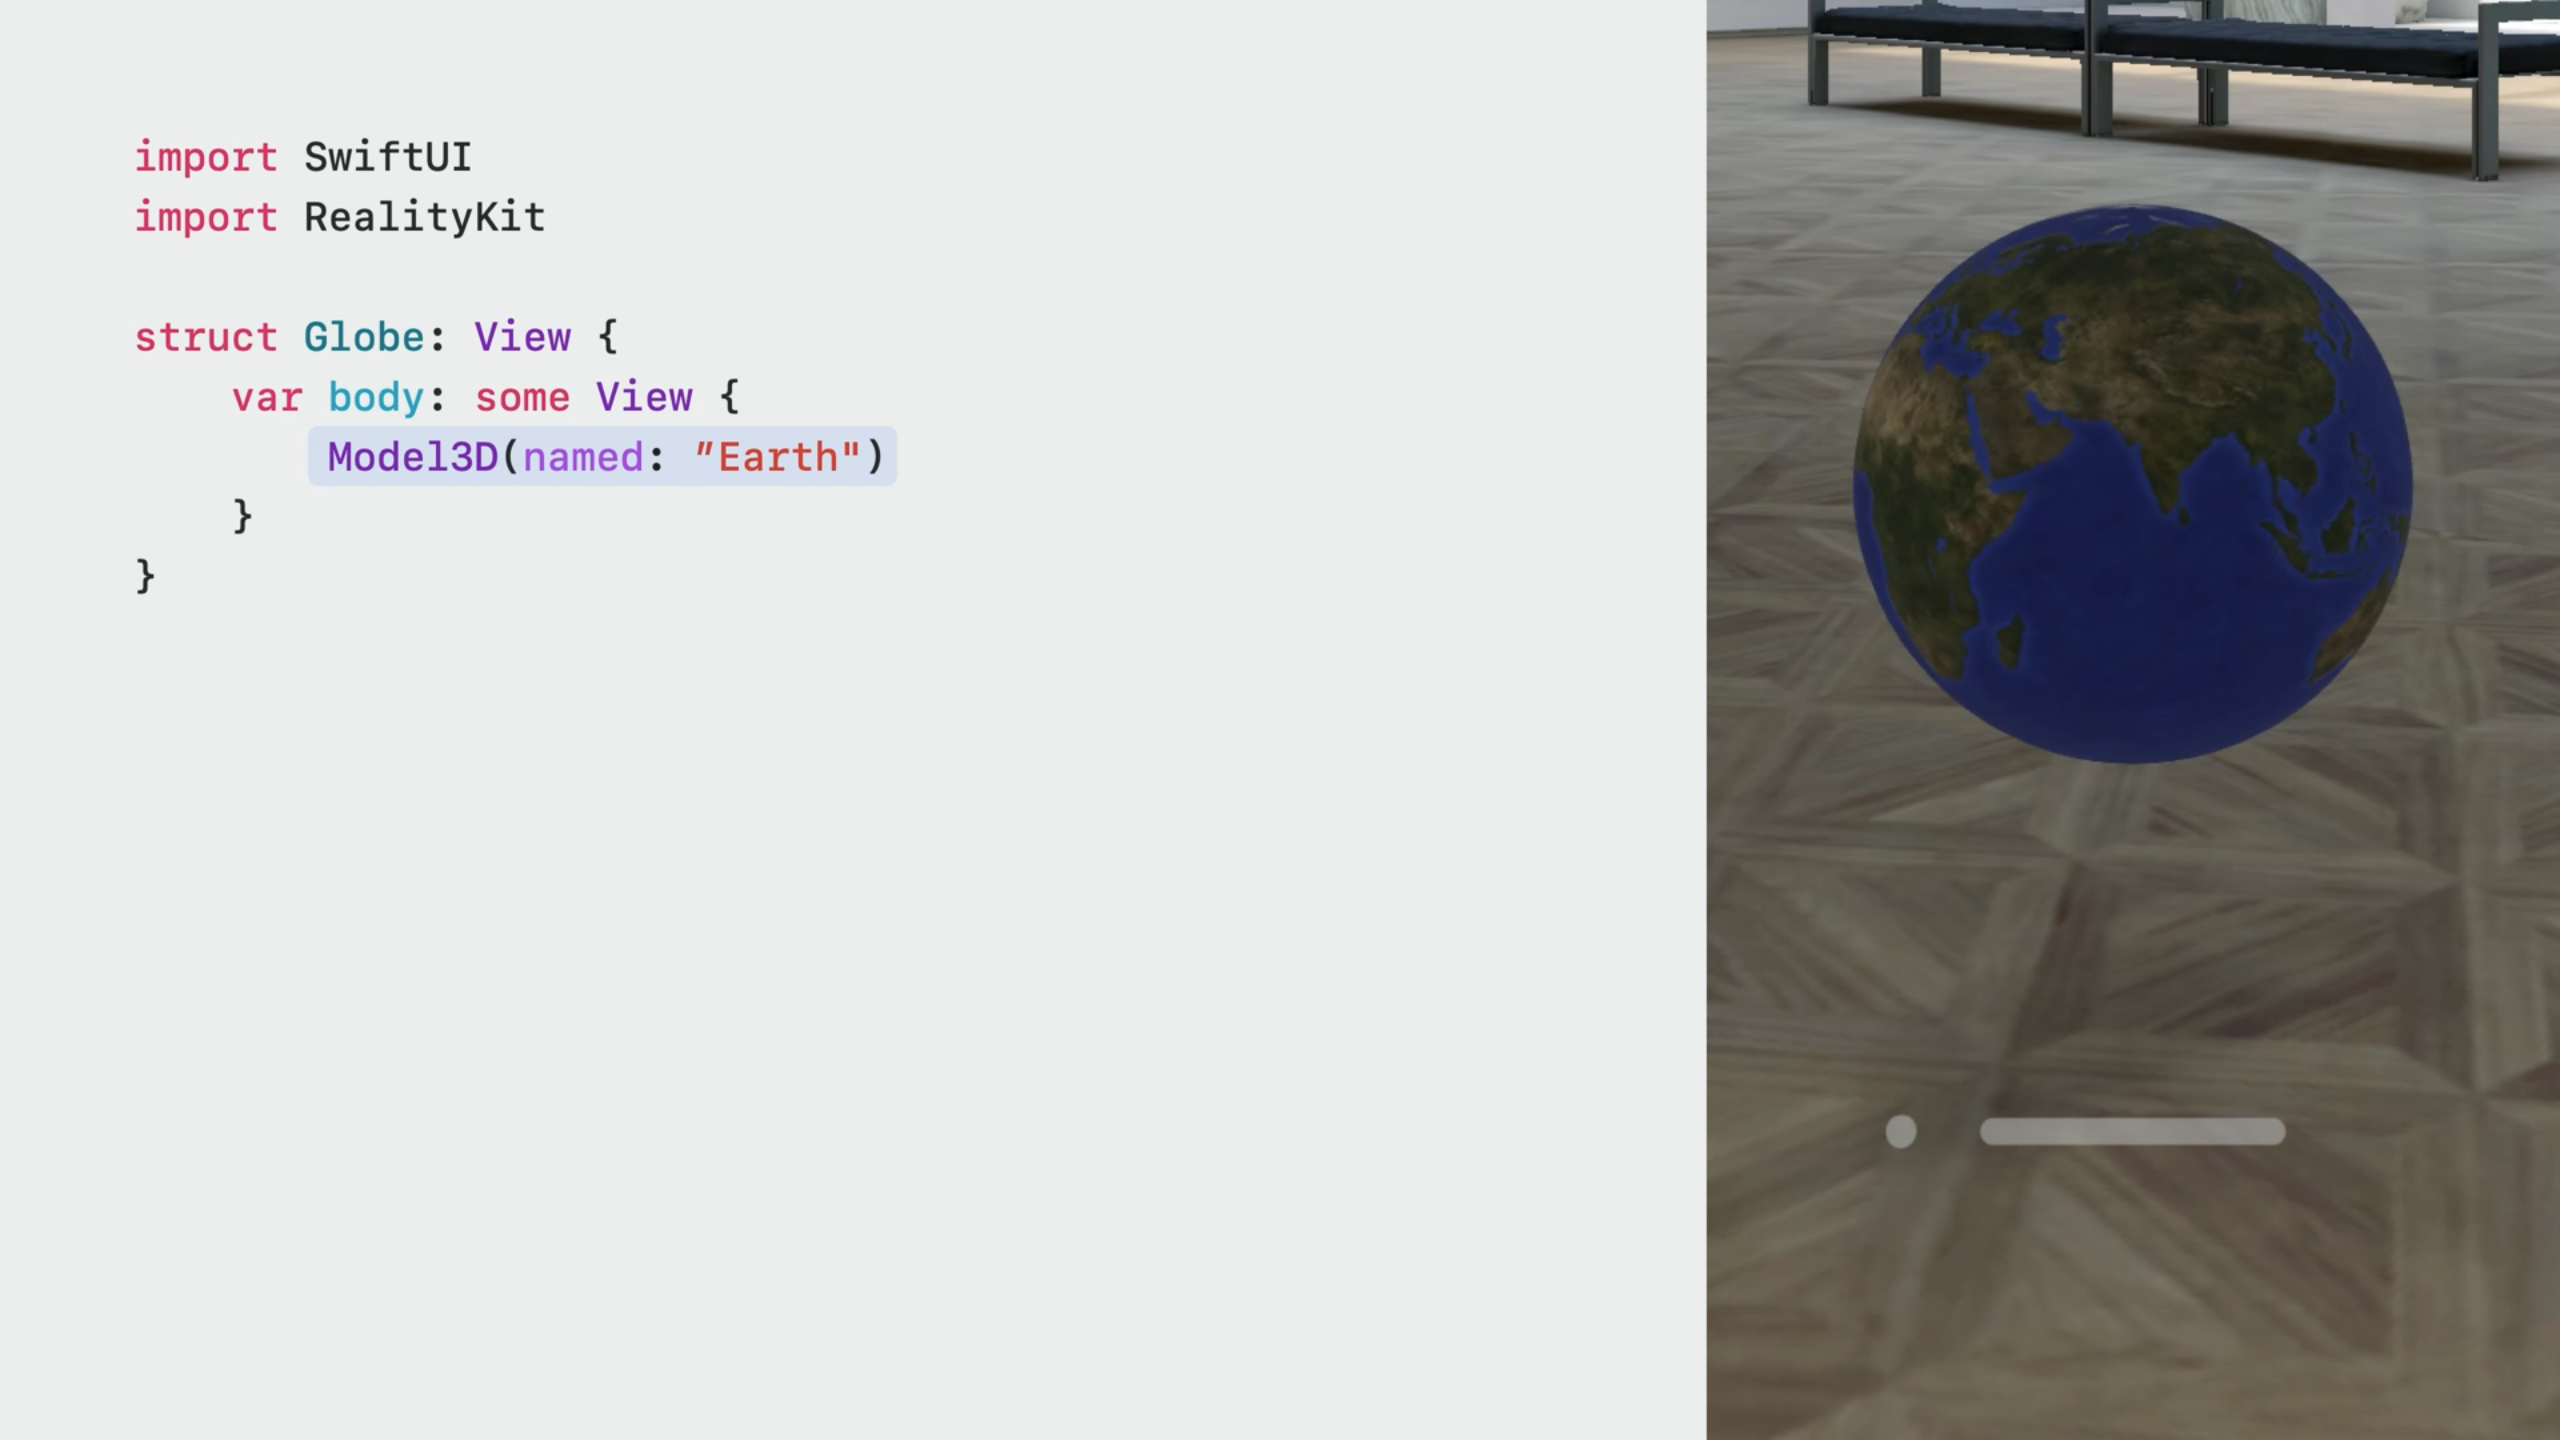
- To display a 3D model, use the new
Model3DAPI from RealityKit.
- A
Model3Dalways loads asynchornously. Similar toAsyncImageView, aModel3Dcan display a placeholder view.
- Layouts like
ZStackare automatically aware of the depth of your content.
RealityView
RealityViewprovides easy access to the full power of RealityKit Pro.
SpatialTapGesturegives the full 3D location of the tap.
- the
tagetedToAnyEntityview modifier provides context like the entity you tapped on and the location relative to that entity.
RealityViewattachments allow mixing custom SwiftUI views together, inline with RealityKit entities.
Full Spaces
ImmersiveSpace
- Add an
ImmersiveSpacescene.
- Provide an id to the space so you can programmatically open it from your main window.
- To open the space, use the new
openImmersiveSpaceenvironment action.
Immersion styles
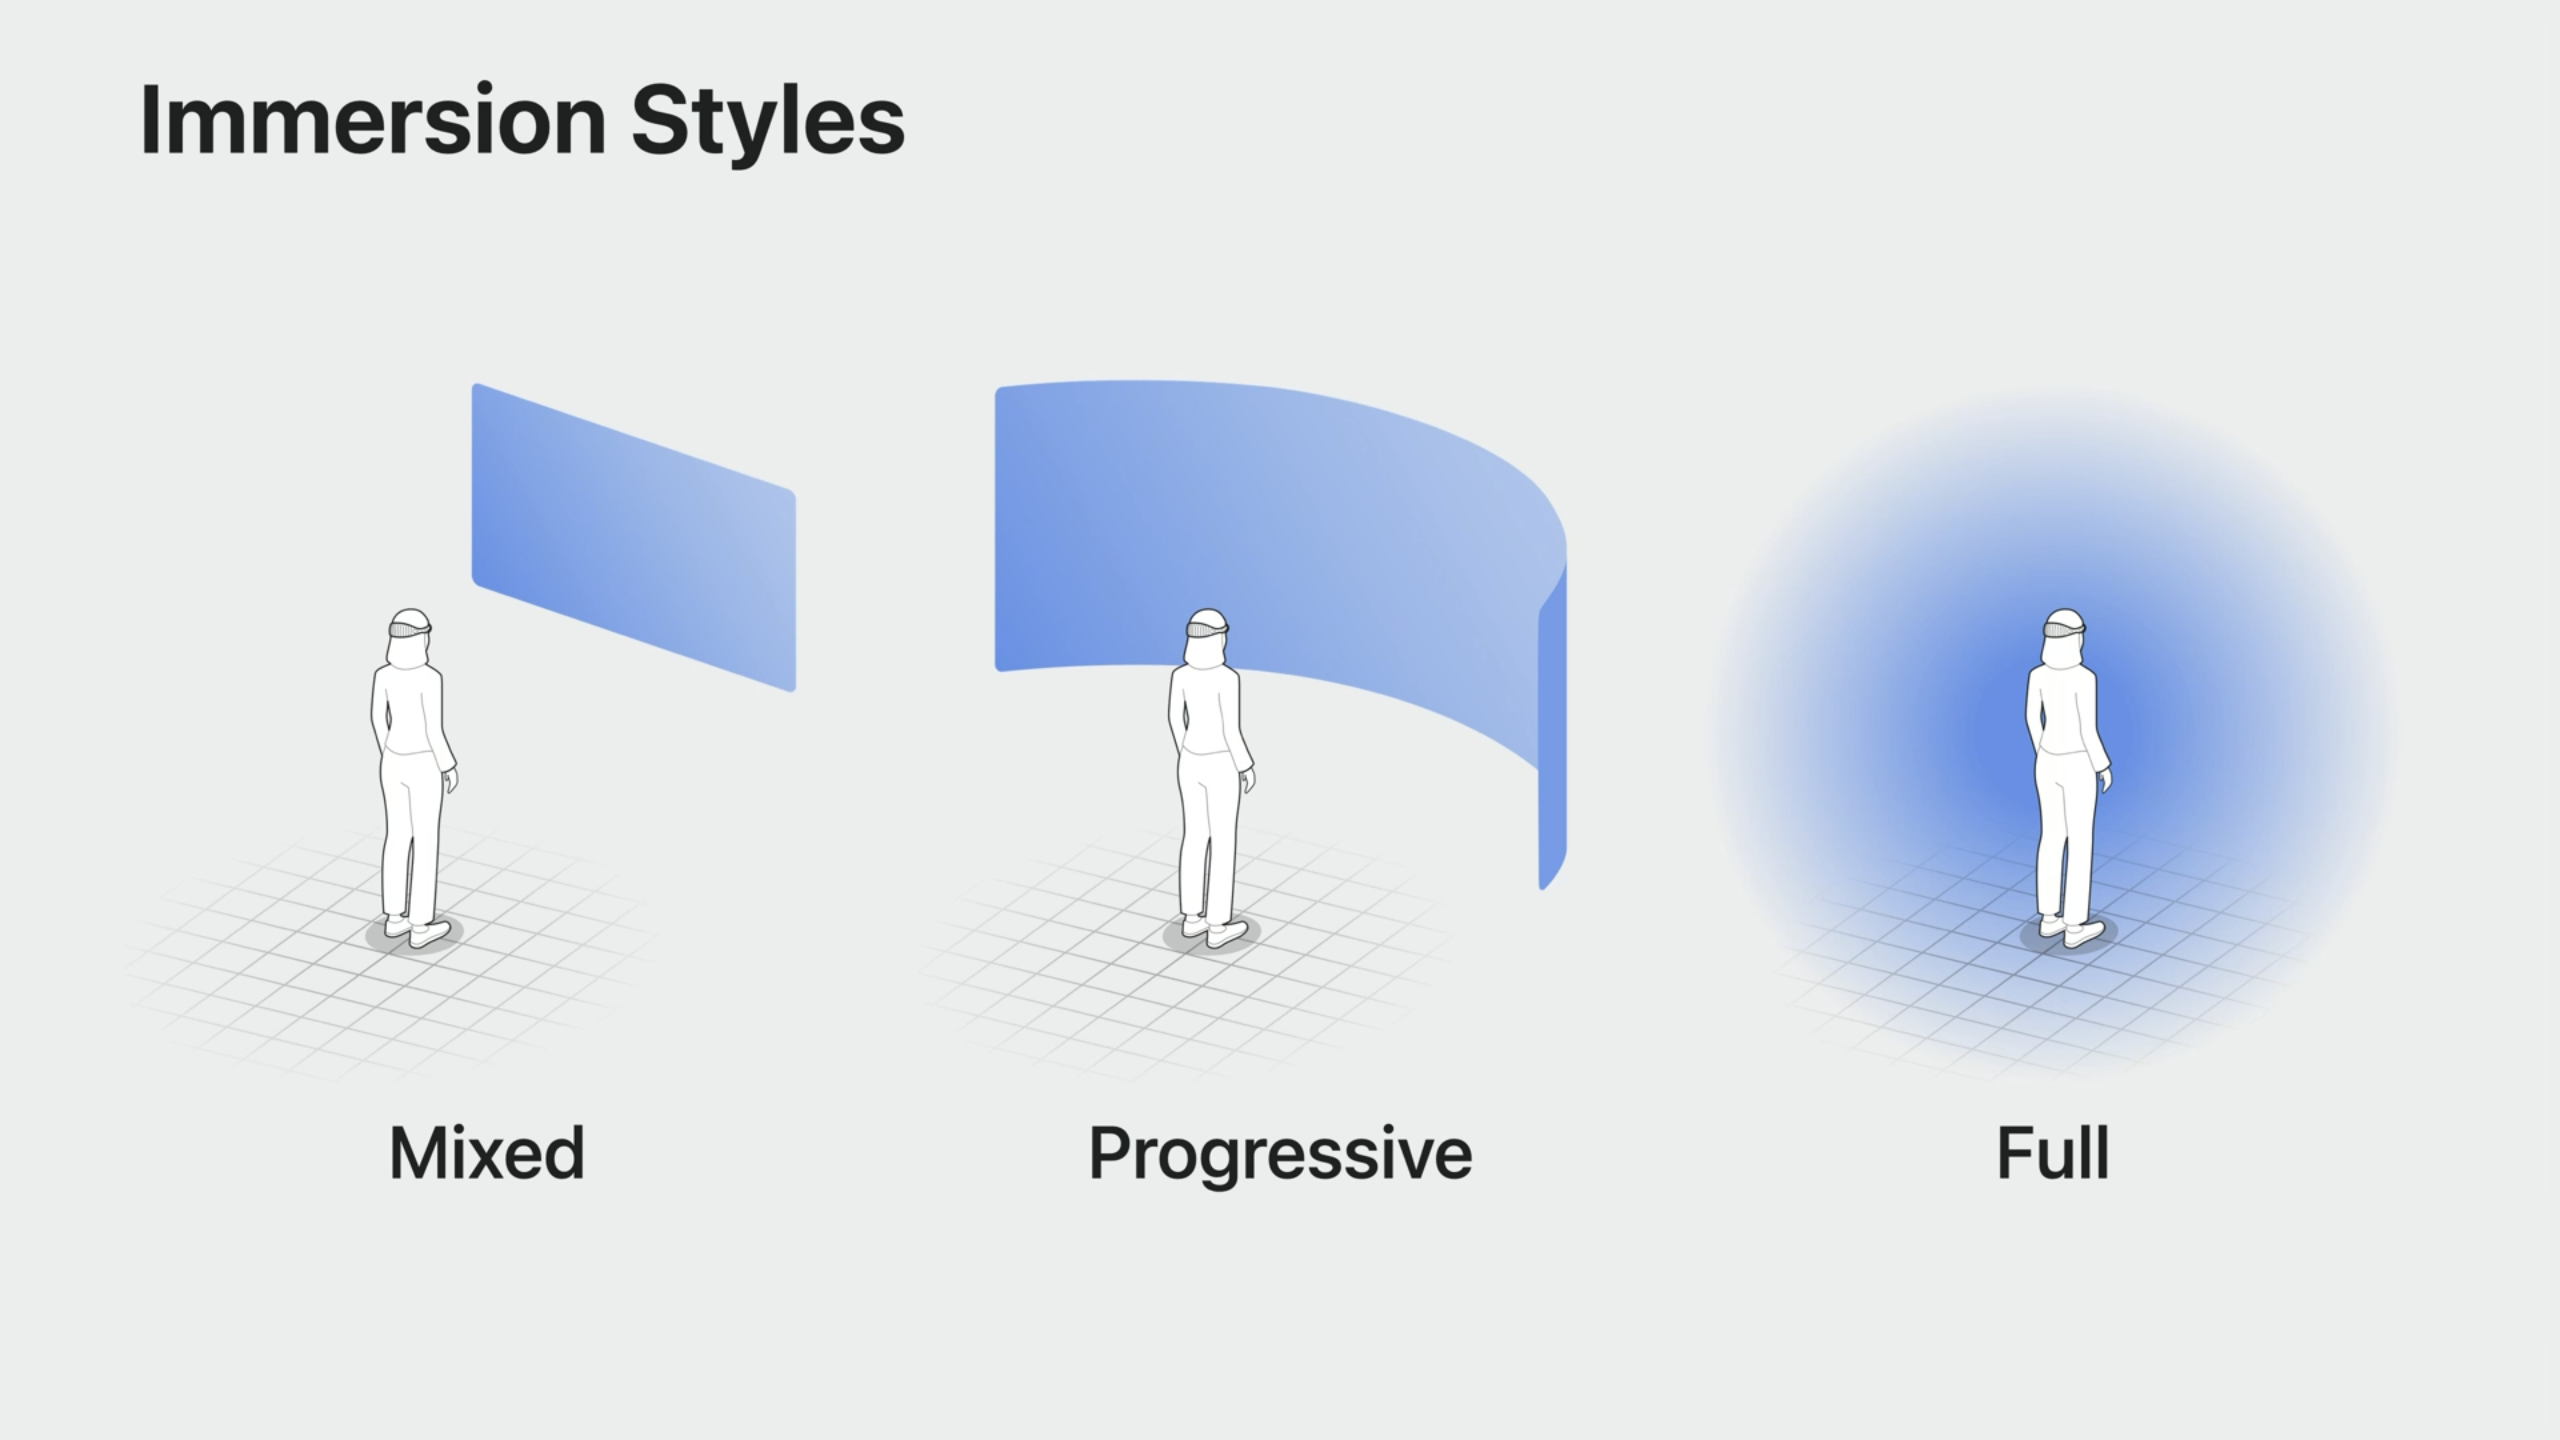
- Mixed, Progressive and Full immersion are supported.
- With Progressive immersion, you can use the digital dial to dial in how much immersion feels right to you.
- Use the
immersionStyleview modifier.
 GitHub
 fadel.io